It’s June, therefore it’s time for anotherstrawberrymead! This year I wanted to have a stronger strawberry flavor, to be a bit drier than past years, and to simplify the herbal process.
I started with a decoction of chaga and a sumac drupe, cooled and strained back into the carboy:
1.5 or 2 gallons of chaga/sumac tea
Next, I used double the amount of strawberries relative to last year — 2 quarts, which weighed 3 pounds – that were lovingly (and knee-achingly) picked by my wife and daughter this morning:
2 quarts/3 pounds of freshly-picked strawberries
Next, I juiced the strawberries in our juicer, which created about a quart and a half of strawberry juice:
1.5 quarts of fresh strawberry juice in the bottom of the stockpot
Next, I added the chaga sumac tea, a bit more water, and enough honey to get me to a 15% initial alcohol potential:
15% initial alcohol potential
Then I pitched the yeast into the carboy, poured the must in after it, and topped it off, to give me 3 gallons of strawberry thunder goodness:
3 gallons of Thunder Strawberry Goodness
I initially thought about calling this batch Strawberry Solstice Mead, but the Solstice was a few days ago, and right when I was making this batch a classic summer thunderhead blasted its way over our house. Strawberry Thunder it is! I expect this batch to be potent, and dry, and full of strawberry flavor. Time will tell!
UPDATE, 12 April 2014
This mead went for a very long time without clearing! It still isn’t clear which is somewhat of a rarity for me these days. I’m sure it’s because of the extra pectin from the abundance of strawberries I used. I finally racked it today and, while not clear, it is delicious, a bit sweet, and tastes strongly of strawberry, coming in at 12.5% alcohol, meaning there is 2.5% remaining alcohol potential, which is somewhere between semisweet and sweet. The strawberries add another layer of perceived sweetness so we’ll call this one a sweet mead.
Because it didn’t clear, I may end up not bottling it in the normal 750ml clear wine bottles, instead using smaller grolsch bottles or larger jugs, for use at fireside gatherings where it will be served in horns and the lack of clarity is not to be noticed. :-)
I have done several batches in the past with spruce (and other evergreen trees). I maintain that they aren’t necessarily my favorite, but many people have loved them. I wanted to do another batch of spruce mead this year, with a few variations on the theme as I “dial in” a precise recipe.
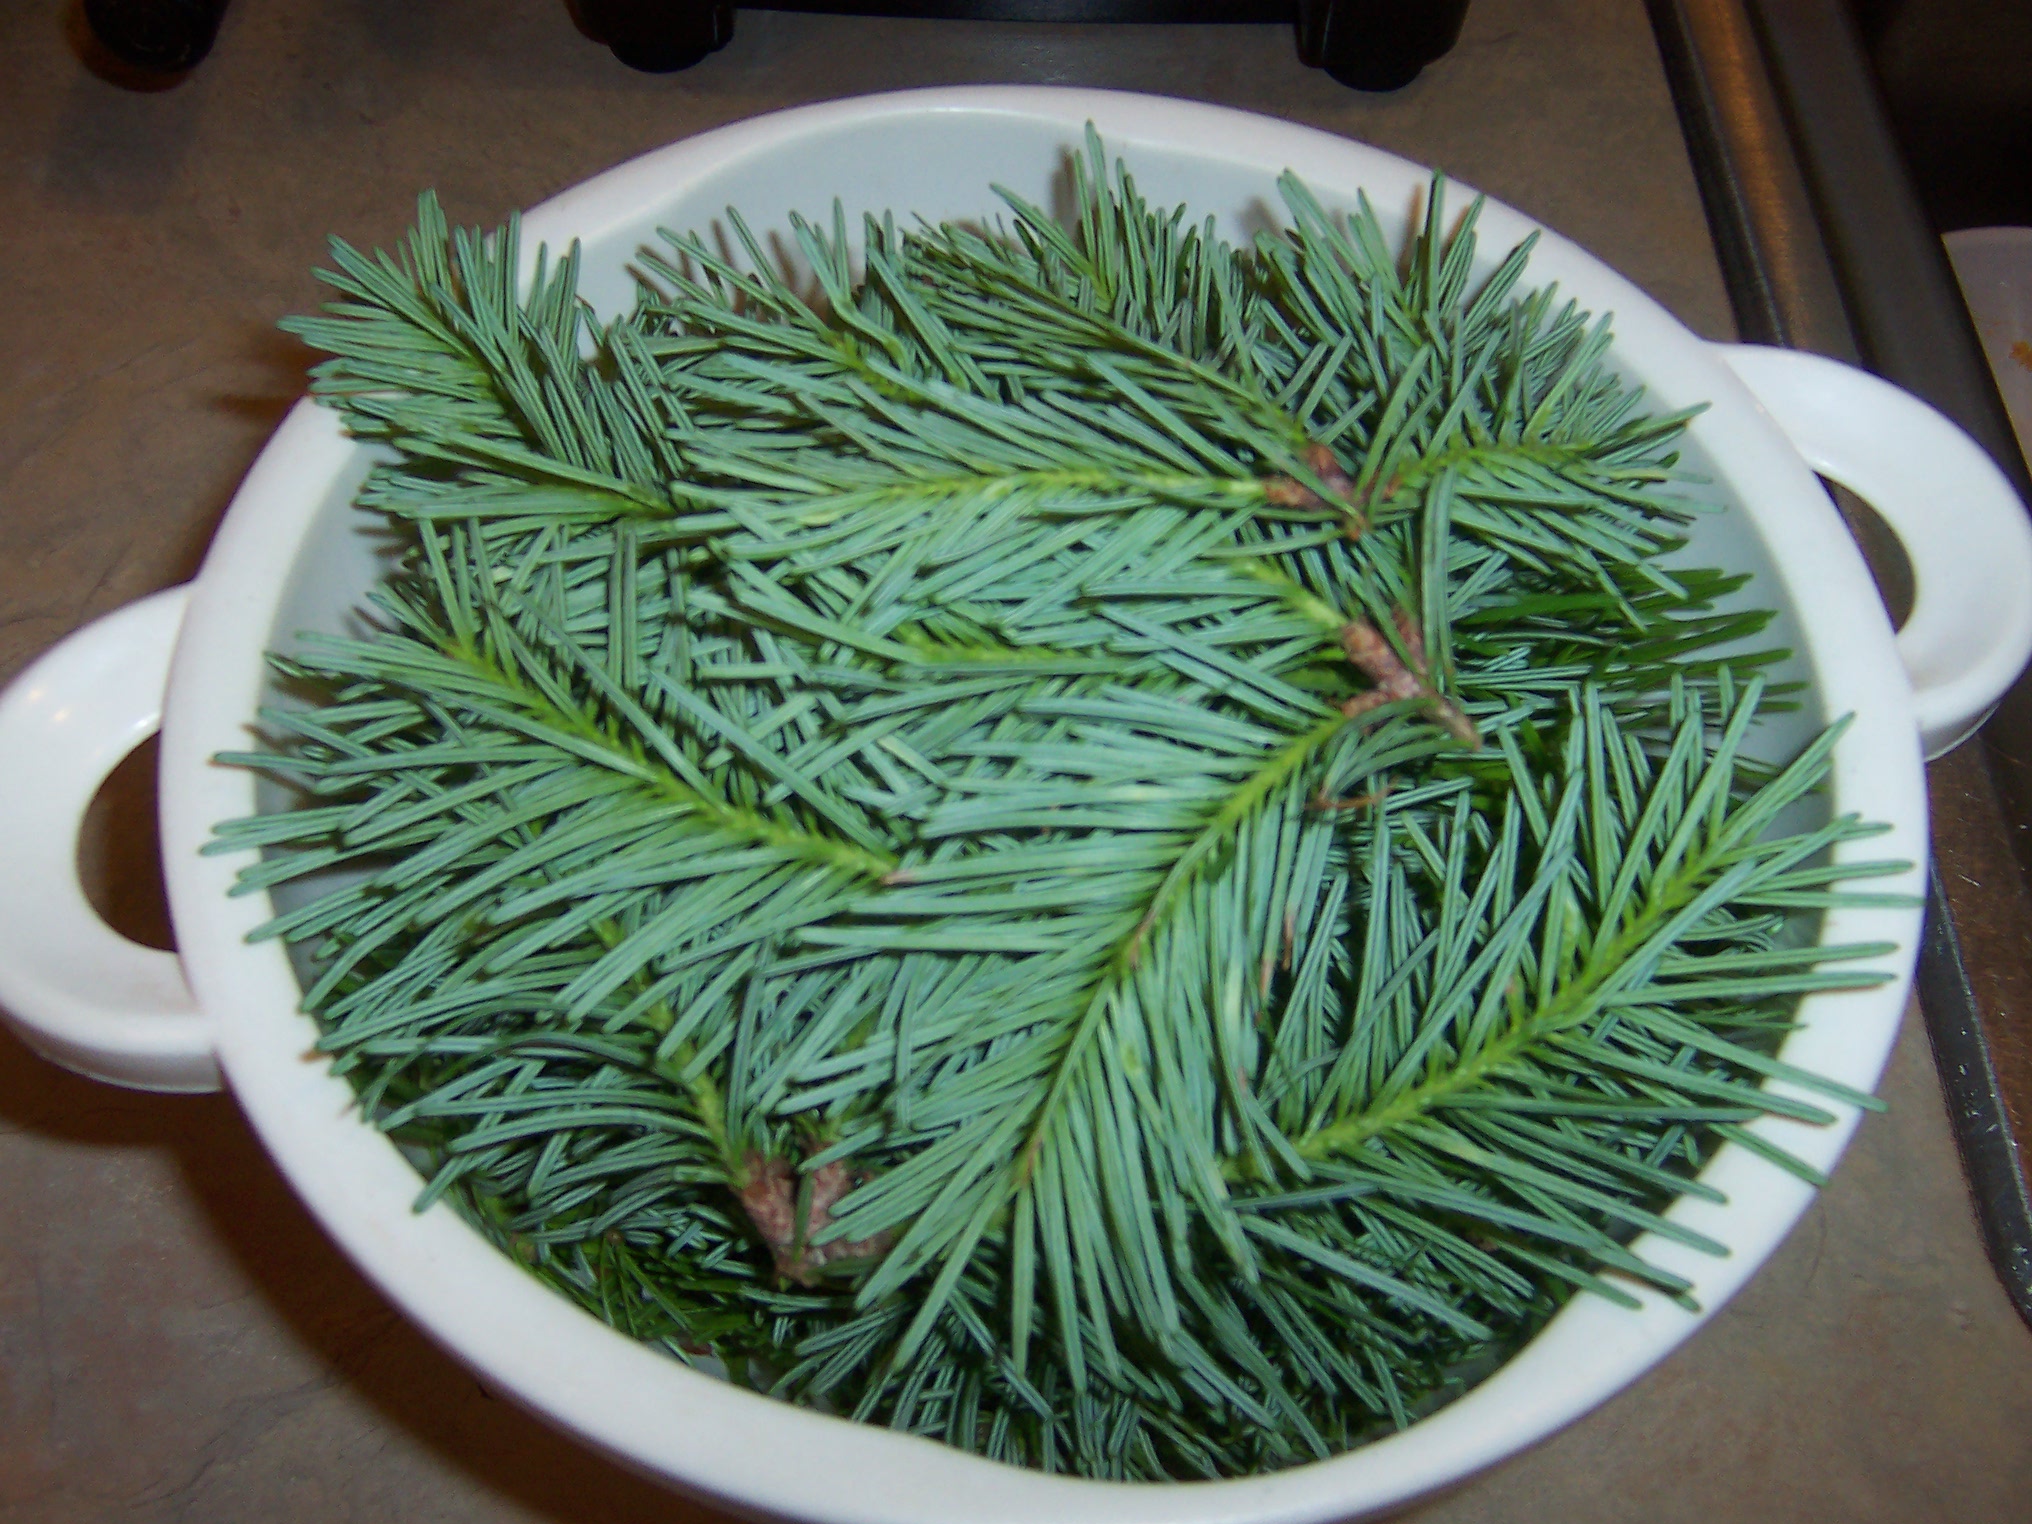
This year, for the first time, I used chaga with my spruce. Some of the spruce meads haven’t cleared very quickly, so hopefully the chaga will assist with that. Also, I gathered the spruce tips a few weeks later than last time. Rather than beautiful tips, these are fully formed needle branches, though they are still a noticeably vibrant green compared to the old growth:
about a half gallon of fresh spruce tips, gathered a bit later in the year than the previous batch
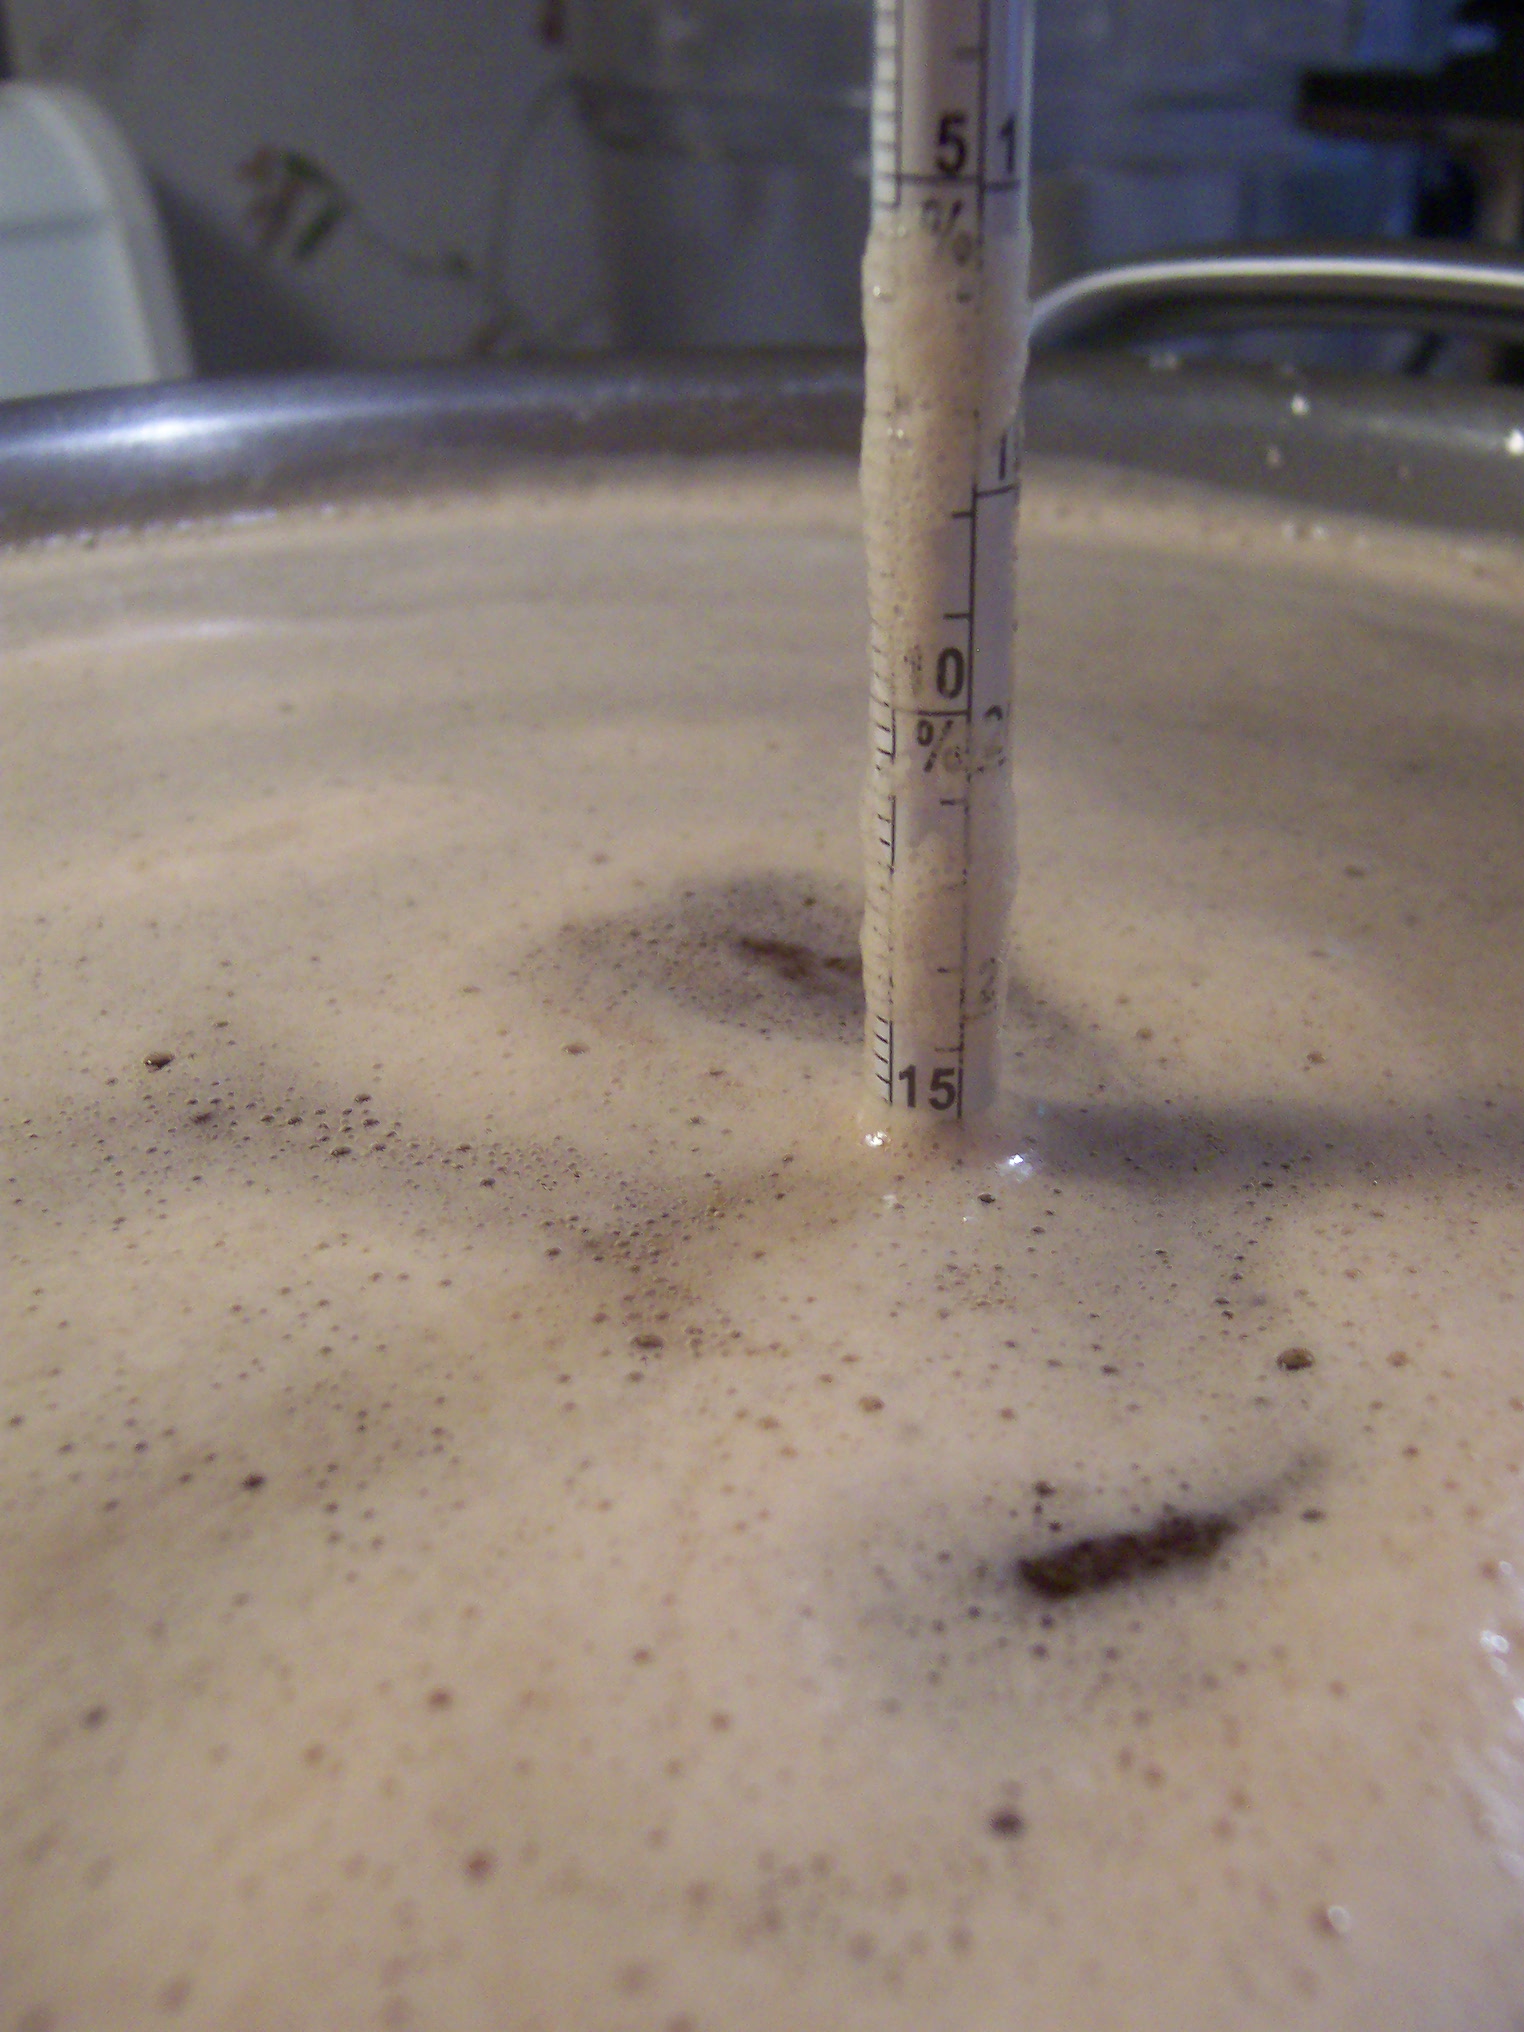
I began with a good chaga decoction, and then added the spruce needles at the end, letting them simmer for about a half hour:
spruce needles in with the chaga decoction
When I got this far, I realized I had far more tea than I needed. Rather than discard any, I strained out the spruce needles, and then turned up the heat to reduce it to more manageable levels. When this was done, I cooled the tea in the sink, strained everything out of it, dissolved enough honey to get to a 17.5% initial alcohol potential, and pitched the yeast into the carboy:
Chaga Spruce Mead
Note that for this batch, I did NOT add any orange juice, black tea, sumac, or anything else to adjust the pH. I wanted to see what a good strong chaga decoction and the spruce tips would do.
UPDATE: 17 October
After 4 months of primary fermentation, this batch has already cleared beautifully, unlike the previous spruce meads. I could have racked it weeks ago, but for a variety of reasons I let it sit until tonight. It’s racked, and it is now 4.5% alcohol potential, therefore it is 13% ABV. It’s quite sweet, which suits the spruce flavor just fine. This one came out great, and should only improve with age!
Well I’m very happy to say, after an all-too-long break I’m back to making mead. I finally picked up a bucket of honey and wanted to immediately get some mead going (all of my carboys were empty!)
Right off, I wanted to get a batch or two of traditional mead going. I really enjoyed The Mad Trad Trial more than I expected to, and committed to making at least a couple of traditional meads per year. Now’s the time.
Of the 4 batches I did in the Mad Trad Trial, they were very close but Mad Trad D was my favorite so I reproduced that recipe. It used chaga & sumac tea as a base, with honey and Montrachet Yeast. I did 2 batches of 3 gallons each, for 6 gallons total.
I started with a strong, 3 gallon chaga decoction that simmered in fresh spring water for about 15 hours. For the last 15 minutes of the decoction, I added 3 sumac drupes. I used more chaga and sumac than I usually do because I wanted the tea to be stronger than usual, since I would be watering it down and splitting it between 2 batches.
Mad Trad D2a had an initial alcohol percentage of 18%.
Mad Trad D2b had an initial alcohol percentage of 17.5%.
I did not take pictures throughout the process (Look back at previous batches on this site if you need help visualizing it), but the final product looks great!
Mad Trad D2, sitting amongst a lot of spring water.
As always, I look forward to enjoying this mead toward the end of 2013.
UPDATE: 18 Aug 2013
Both of these cleared in the carboys, so I racked them today. Both are 13%ABV, which means Mad Trad D2a is slightly sweeter at 5% remaining potential, with D2B at 4.5%. Both of these are, once again, scrumptious with a fantastic honey flavor profile left behind.
Interestingly, the original Mad Trad D ended up slightly stronger at 14%, and slightly less sweet. This means the yeast crapped out a bit earlier on this batch than the previous one for some reason. It was later in the year, and we had quite a heat wave followed by a month of seasonally cool temperatures in the 70s, so that could be a related factor.
We’ve been enjoying Kombucha in the house on a regular basis for a couple of years now. I don’t make it, my wife Lisa Marie does. This entry on how she makes the kombucha has been in the works for nearly a year — let me publicly apologize for taking so long to post this. Thanks to Lisa Marie for outlining her method on kombucha for bardicbrews.net readers.
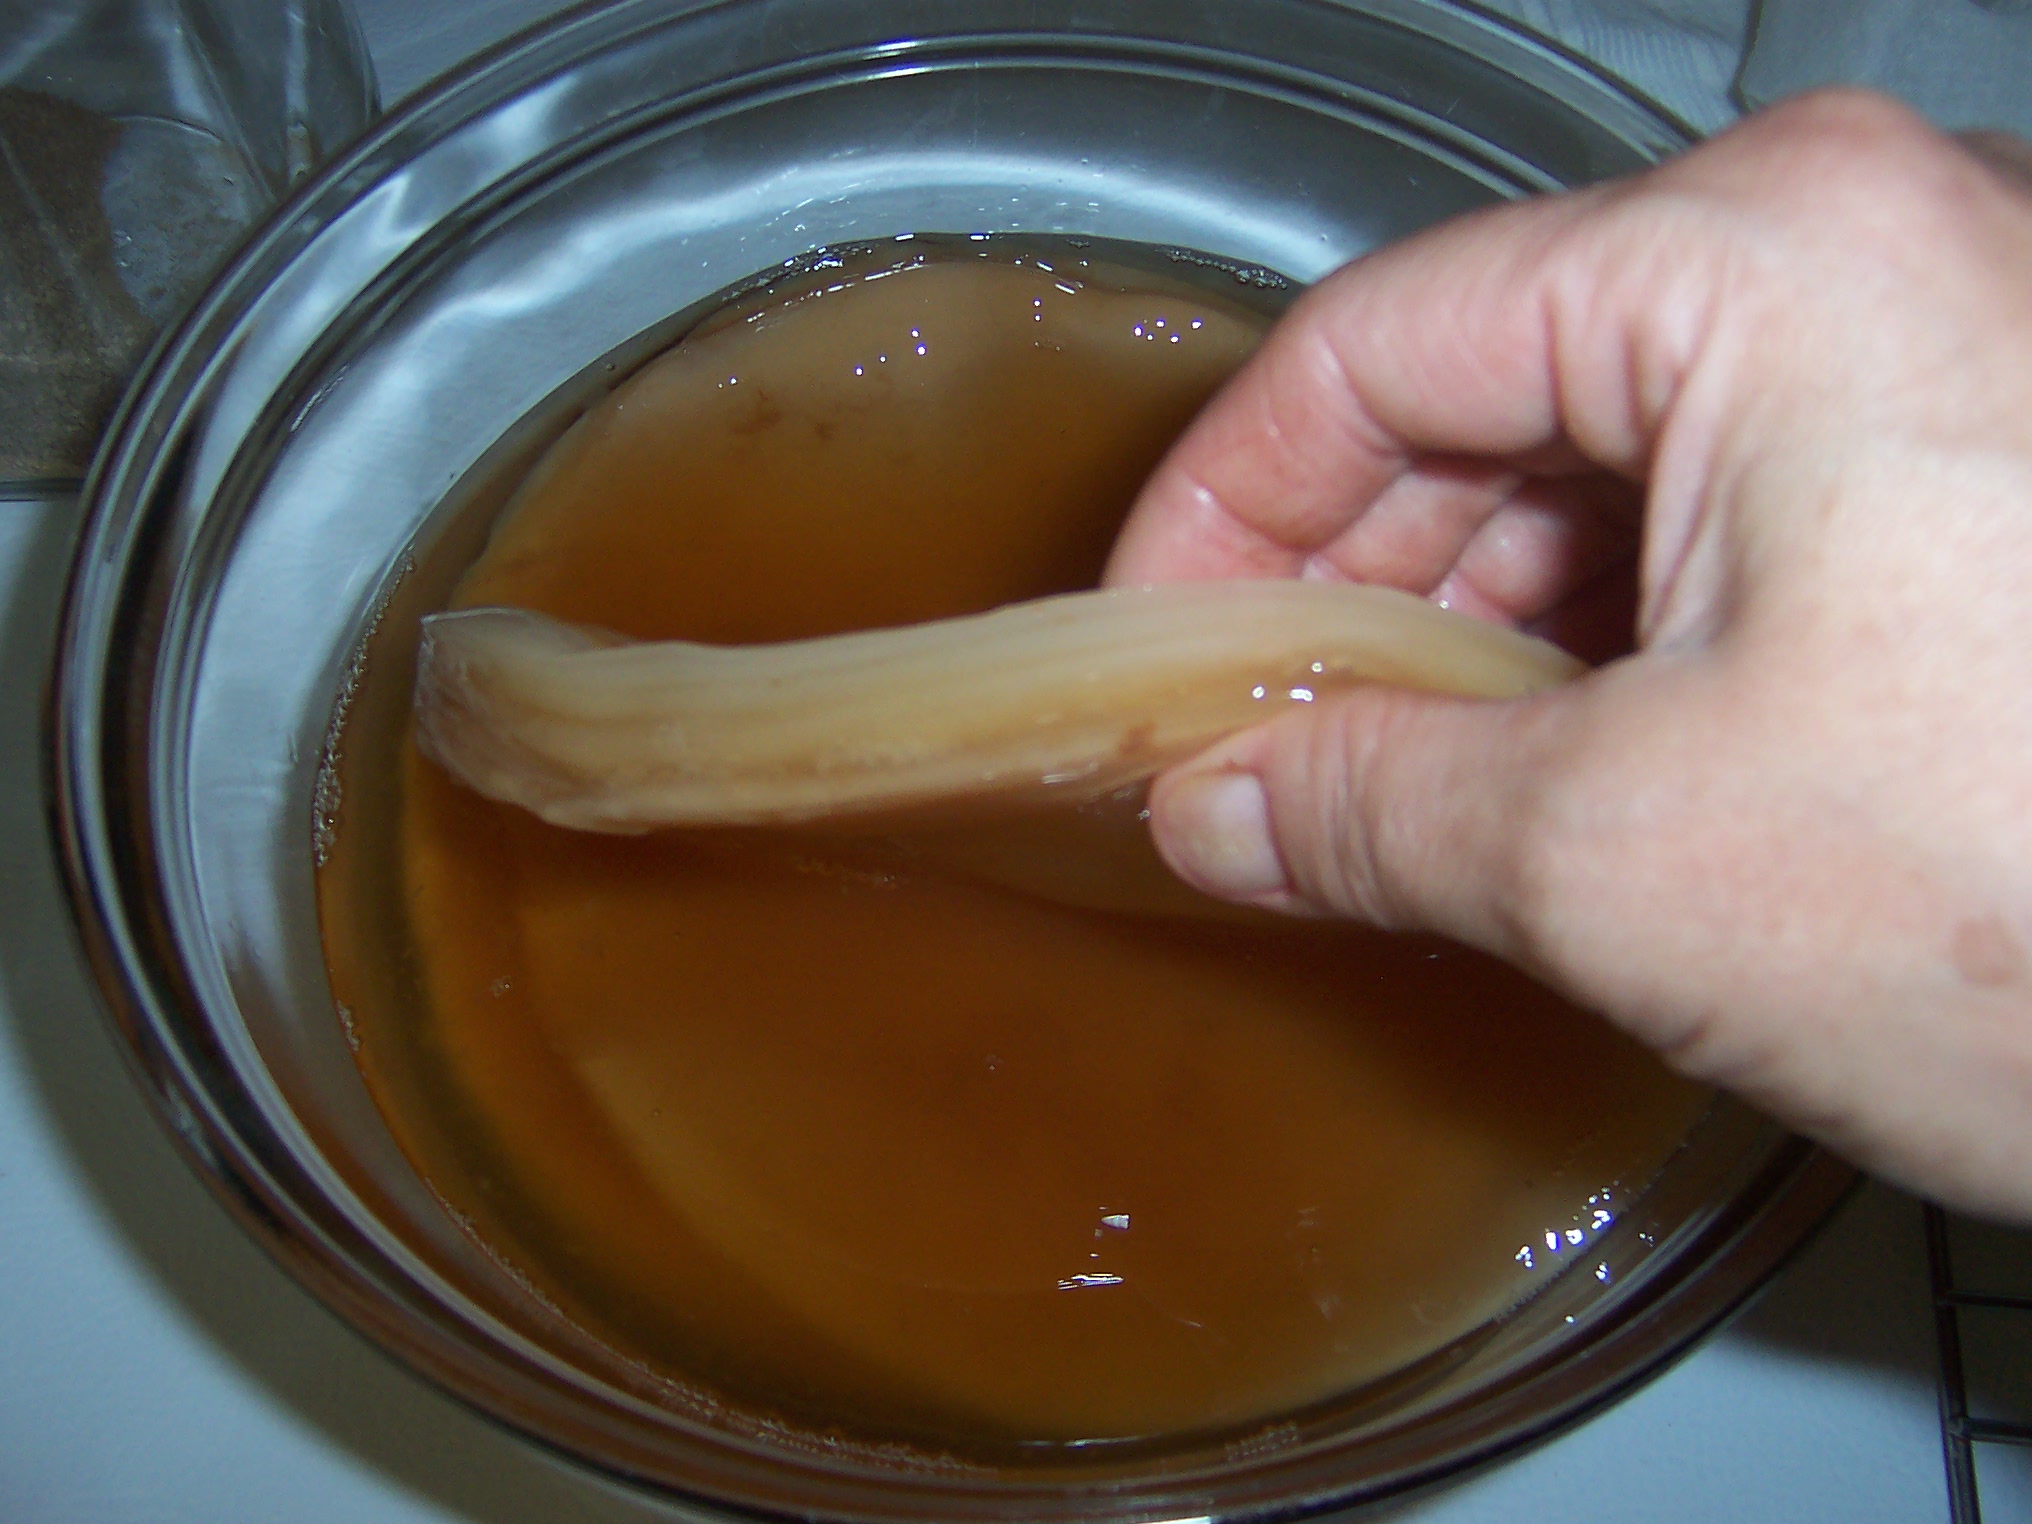
Kombucha is “an effervescent fermentation of sweetened tea.” But rather than using yeast to “eat” the sugar and create alcohol, we use something called a SCOBY. SCOBY stands for Symbiotic Culture Of Bacteria & Yeast. It is a coherent structure, almost like a “blob” or a collection of slime that looks like this:
This is a SCOBY
In general it is best to get a SCOBY from someone willing to barter; paying for these things (unless it’s like a buck or something) is just dumb. Wrong energy, at least in Lisa Marie’s opinion. If you don’t know where to start, don’t start on the ‘net. Ask around at local health food stores, etc. You meet some of the coolest people this way. : )
You will also need a container for fermenting, NOT a carboy with an airlock. We prefer a traditional crock. We have also used a glass gallon jar, but didn’t get as nice a ferment out of it. Perhaps it was too much exposure to light? We don’t recommend using anything metal. Metal should never come in contact with your SCOBY or your fermented beverage. Check around yard sales or flea markets for cool crocks.
As always, use the best water you can. If there is fluoride or chlorine in your water it won’t help your brewing in any way.
Kombucha is also made with tea. We use the store brand of organic black tea. We prefer a caffeinated black or green tea to make my kombucha, though there are several variations and combinations of herbs and teas that could be used. This is where the internet is quite helpful. There are so many people experimenting with kombuchas these days, which is fantastic.
You will also need sugar. The type of sugar one should use is controversial. No, you can’t use honey because honey is an antibacterial and will kill your SCOBY. Different sugars will give you different-tasting kombuchas. Our advice is to always go as local as possible and use something as unrefined and as organic as possible. We use organic cane juice. I’ve been jonesin’ to try a local maple sugar. Maybe someday soon!
Add-ins… This is where the fun starts. The one we’ve been stuck on recently is Rosehip Kombucha. It’s fun to experiment, but definitely do your research first. Some plants and mushrooms are antibacterial and/or antiviral. Keep those away from your SCOBY! Add-ins can be added to the tea during fermentation (like the rosehips) or to the bottle before filling with the fermented tea (like spirulina powder, cider, or grated fresh ginger).
You will also need bottles, and other supplies like a funnel and a ladle. We prefer Grolsch bottles because they are easy to use, are re-usable, and don’t require new caps periodically. For making the tea you will need a wooden spoon and a strainer. Lastly, you will need a thin cloth like a handkerchief or a cloth napkin and a rubber band to cover the crock during fermentation.
The Process
This recipe for Rosehip Kombucha makes 1 gallon or about 6 12-oz. Grolsch bottles’ worth of ‘booch.
1. Boil 1 gallon of water:
2. Turn off heat and add 1 c. sugar, 5 tea bags (or approximation of equivalent tea), and a couple handfuls of dried rosehips:
1c. sugar, 5 black teabags, 2 handfuls of rosehips
3. Stir well with wooden spoon and let steep with lid on. If you are using black tea, do not let this steep for more than 10 minutes. Our research has shown that steeping times longer than 10 minutes release unhealthy amounts of fluoride into your teas.
4. Strain tea into crock:
Strain the tea into your crock
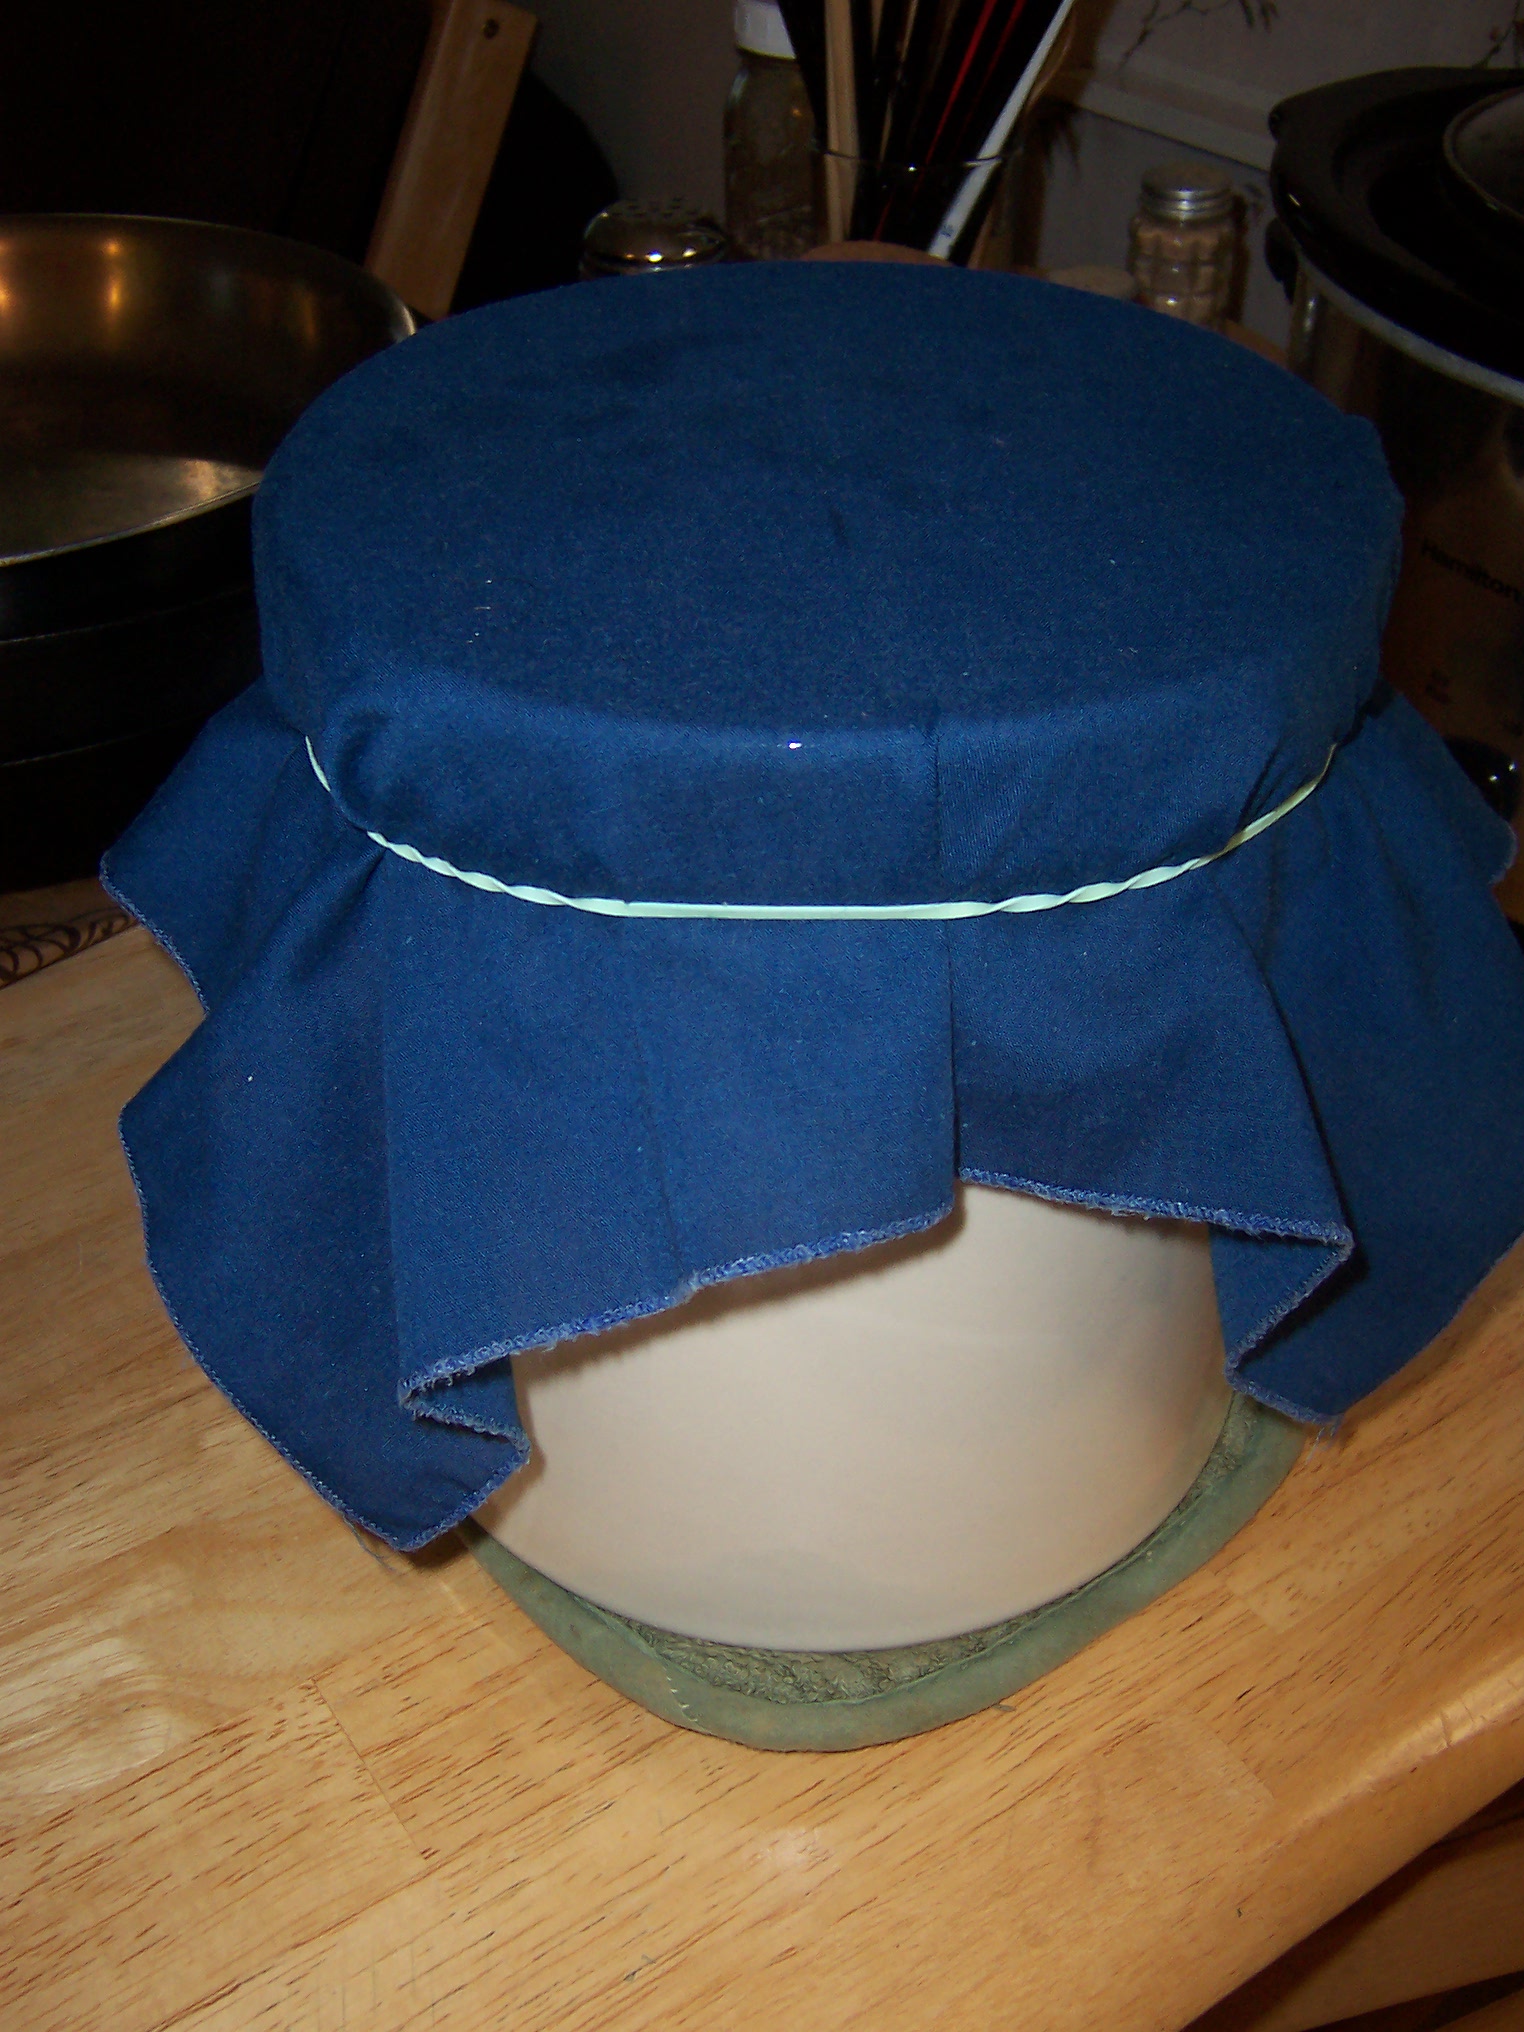
5. Cover with cloth and rubber band and let cool to room temp (test with pinky):
cover crock with a cloth & rubber band and let cool.
6. When cool to room temp, stir in (with your wooden spoon) about 1 cup of a previous batch of kombucha. Gently lay your SCOBY [my picture shows a mother with a few babies… some are thicker, some are thinner) on top of the tea mixture. Don’t worry if it sinks. It will eventually rise up in a day or so.
A one-gallon crock filled with sweetened tea, and a SCOBY floating on top. In time, this will be kombucha.
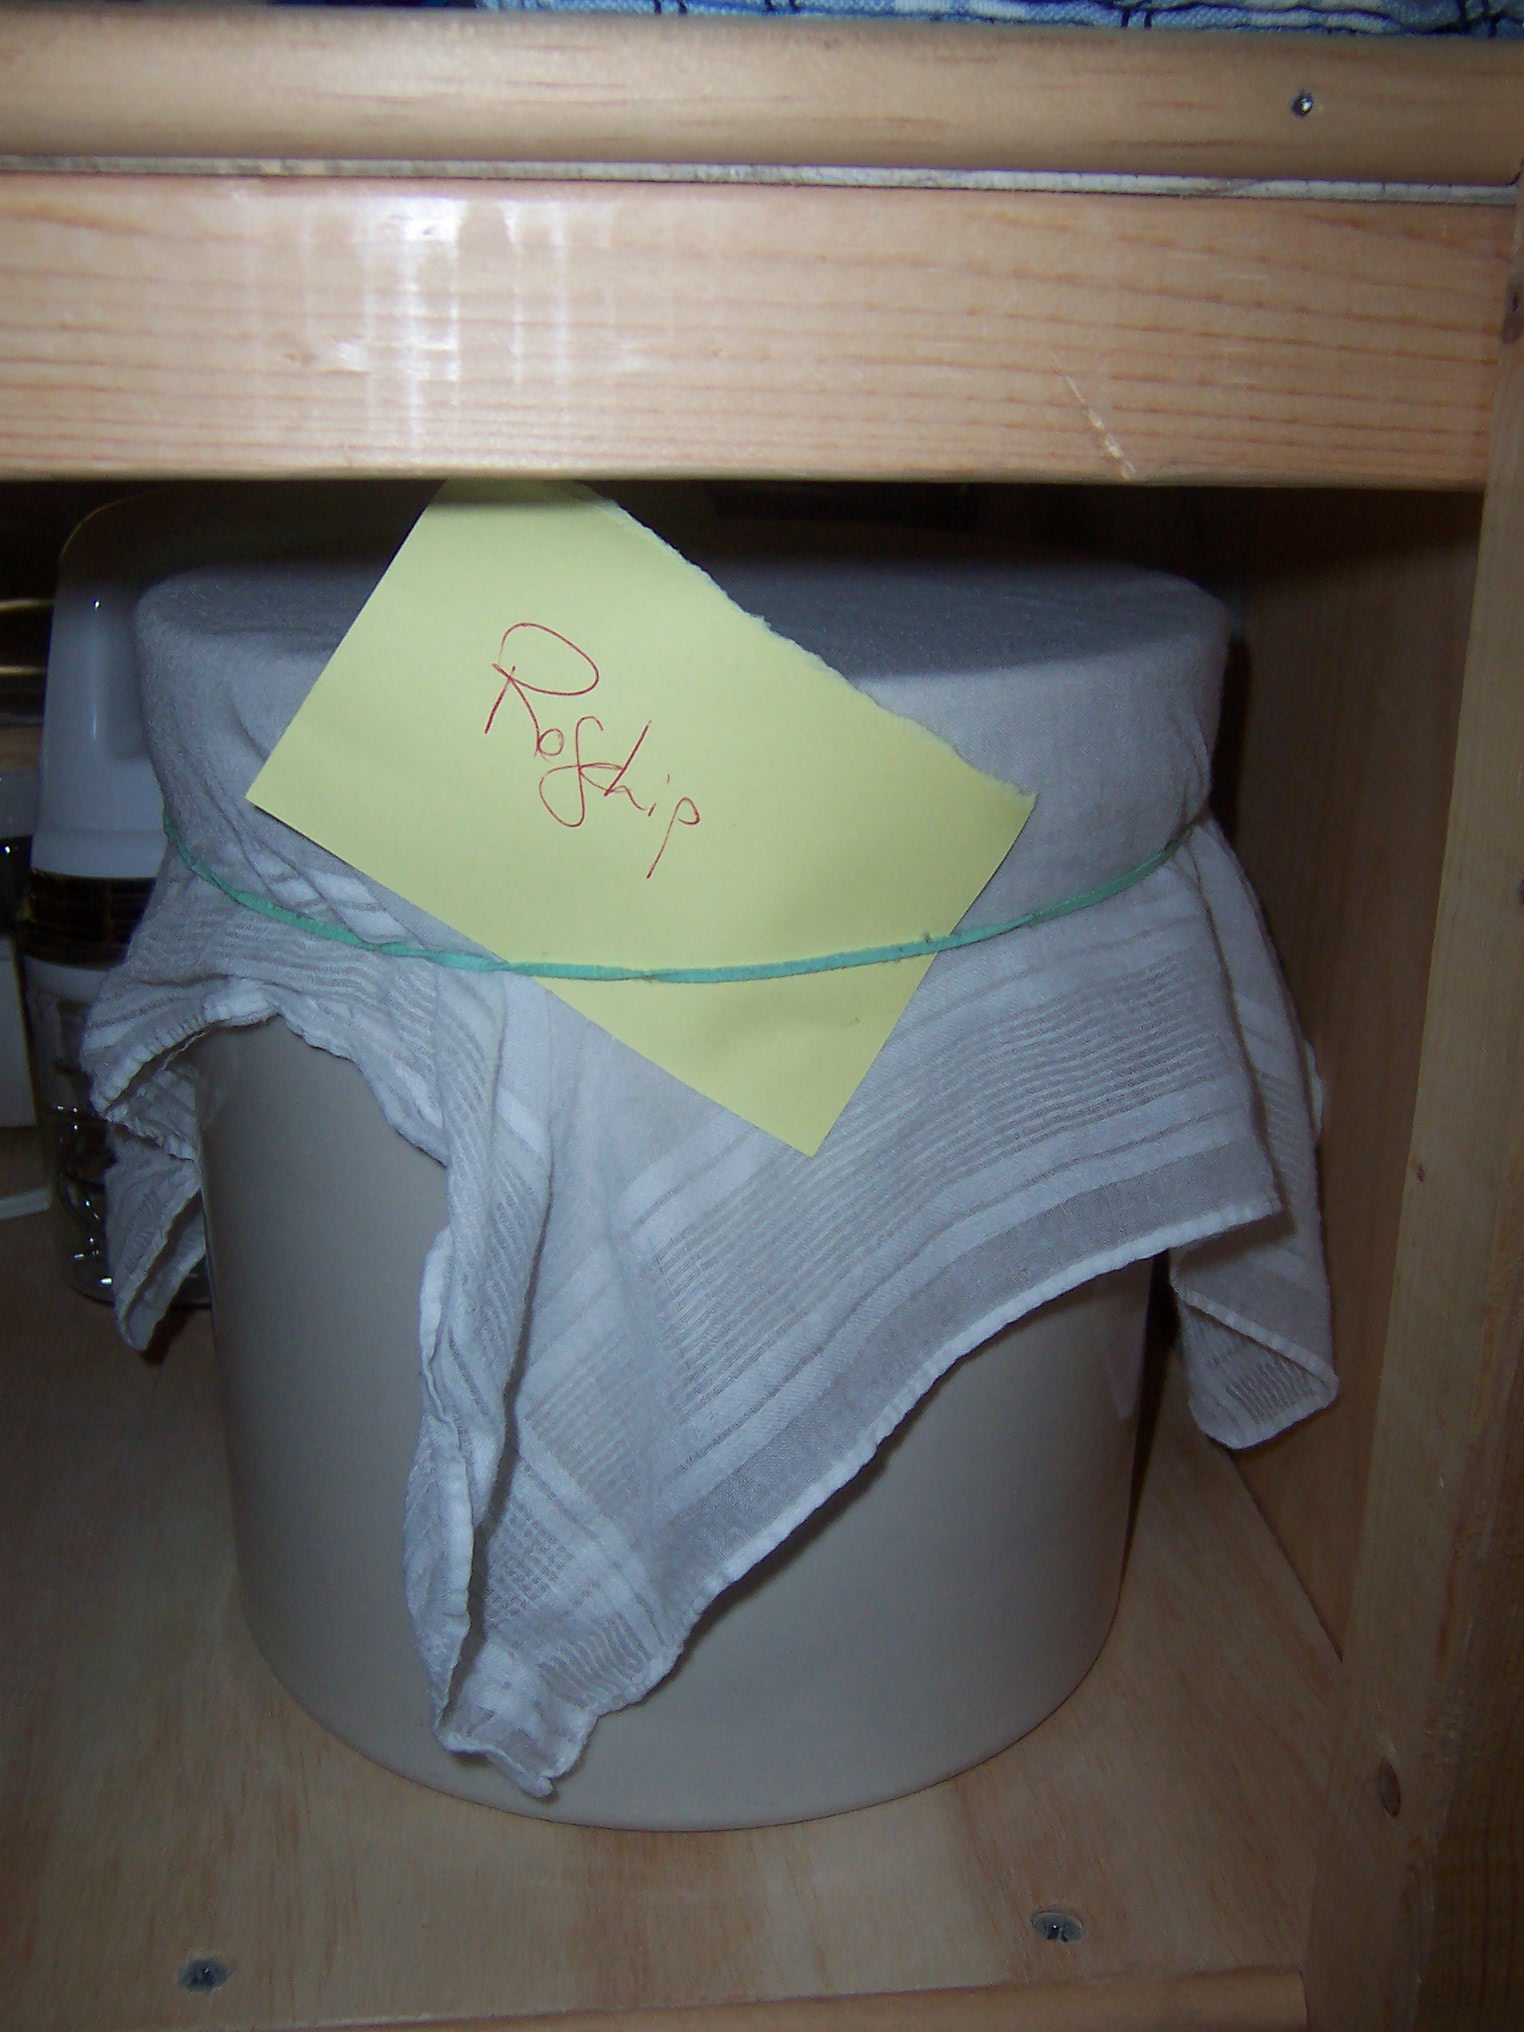
7. Cover with cloth and rubber band and label, if necessary.
‘Booch during fermentation.
8. Most kombuchas take anywhere from 7-30 days to ferment. We always check ours after about 5 days to see where it’s at. Using a wooden or plastic spoon, take a sample from underneath the SCOBY and taste it. Some people like it more vinegary, some more sweet. When it tastes good to you, it’s ready to bottle.
9. For bottling, we prefer to use Grolsch bottles with re-useable seals at the top. It’s important to ladle the ‘booch slowly, with the bottle turned at a steep angle to preserve carbonation and prevent overflow.
Remember, some kombuchas are fizzy and some aren’t. This has to do with ingredients used and ambient temperature of the room in which you’re storing the kombucha, as well as how much sugar is left in the tea when you bottle. Some of our kombuchas have gone in with no fizz and have opened with quite a bang! To prevent a mess, always open a homebrew kombucha bottle over the sink!
Storage advice varies from person to person. We store ours outside the fridge and put in two each night for the next day. Refrigeration slows fermentation; I still want those yeasties working.
You’re going to get little kombucha stringies (some call them “threads”) or mini-mothers (little SCOBY) in your kombucha. They’re totally fine to ingest – and are actually quite beneficial to the gut! Go ahead: slug ’em back!
It’s been cold this week. Maine gets cold in the winter, but this past week has been like nothing I’ve seen in a long time, in terms of the number of cold days in a row. We haven’t seen 20 degrees Fahrenheit in nearly a week, and the lows have been in the negative double-digits.
Clearly it’s time to hibernate, and a hibernation mead is in order. This will be (for now) a plain mead, though I am definitely thinking about trying my first spiced mead. I began with basically the same recipe as Mad Trad D from the Mad Trad Trial: chaga and sumac with my basic mead recipe. This is a nice, rich decoction:
At the end of a 12-hour chaga decoction, I tossed a staghorn sumac drupe in for the last 15 minutes
Once I cooled it down to blood temperature, I added enough honey to get to a 16% initial alcohol potential:
16% initial alcohol potential
After I pitched the yeast, I was left with a beautiful brown must:
A plain mead…. for now.
There will be more to this story…. spicing. Hmmm……
UPDATE: May 15, 2013
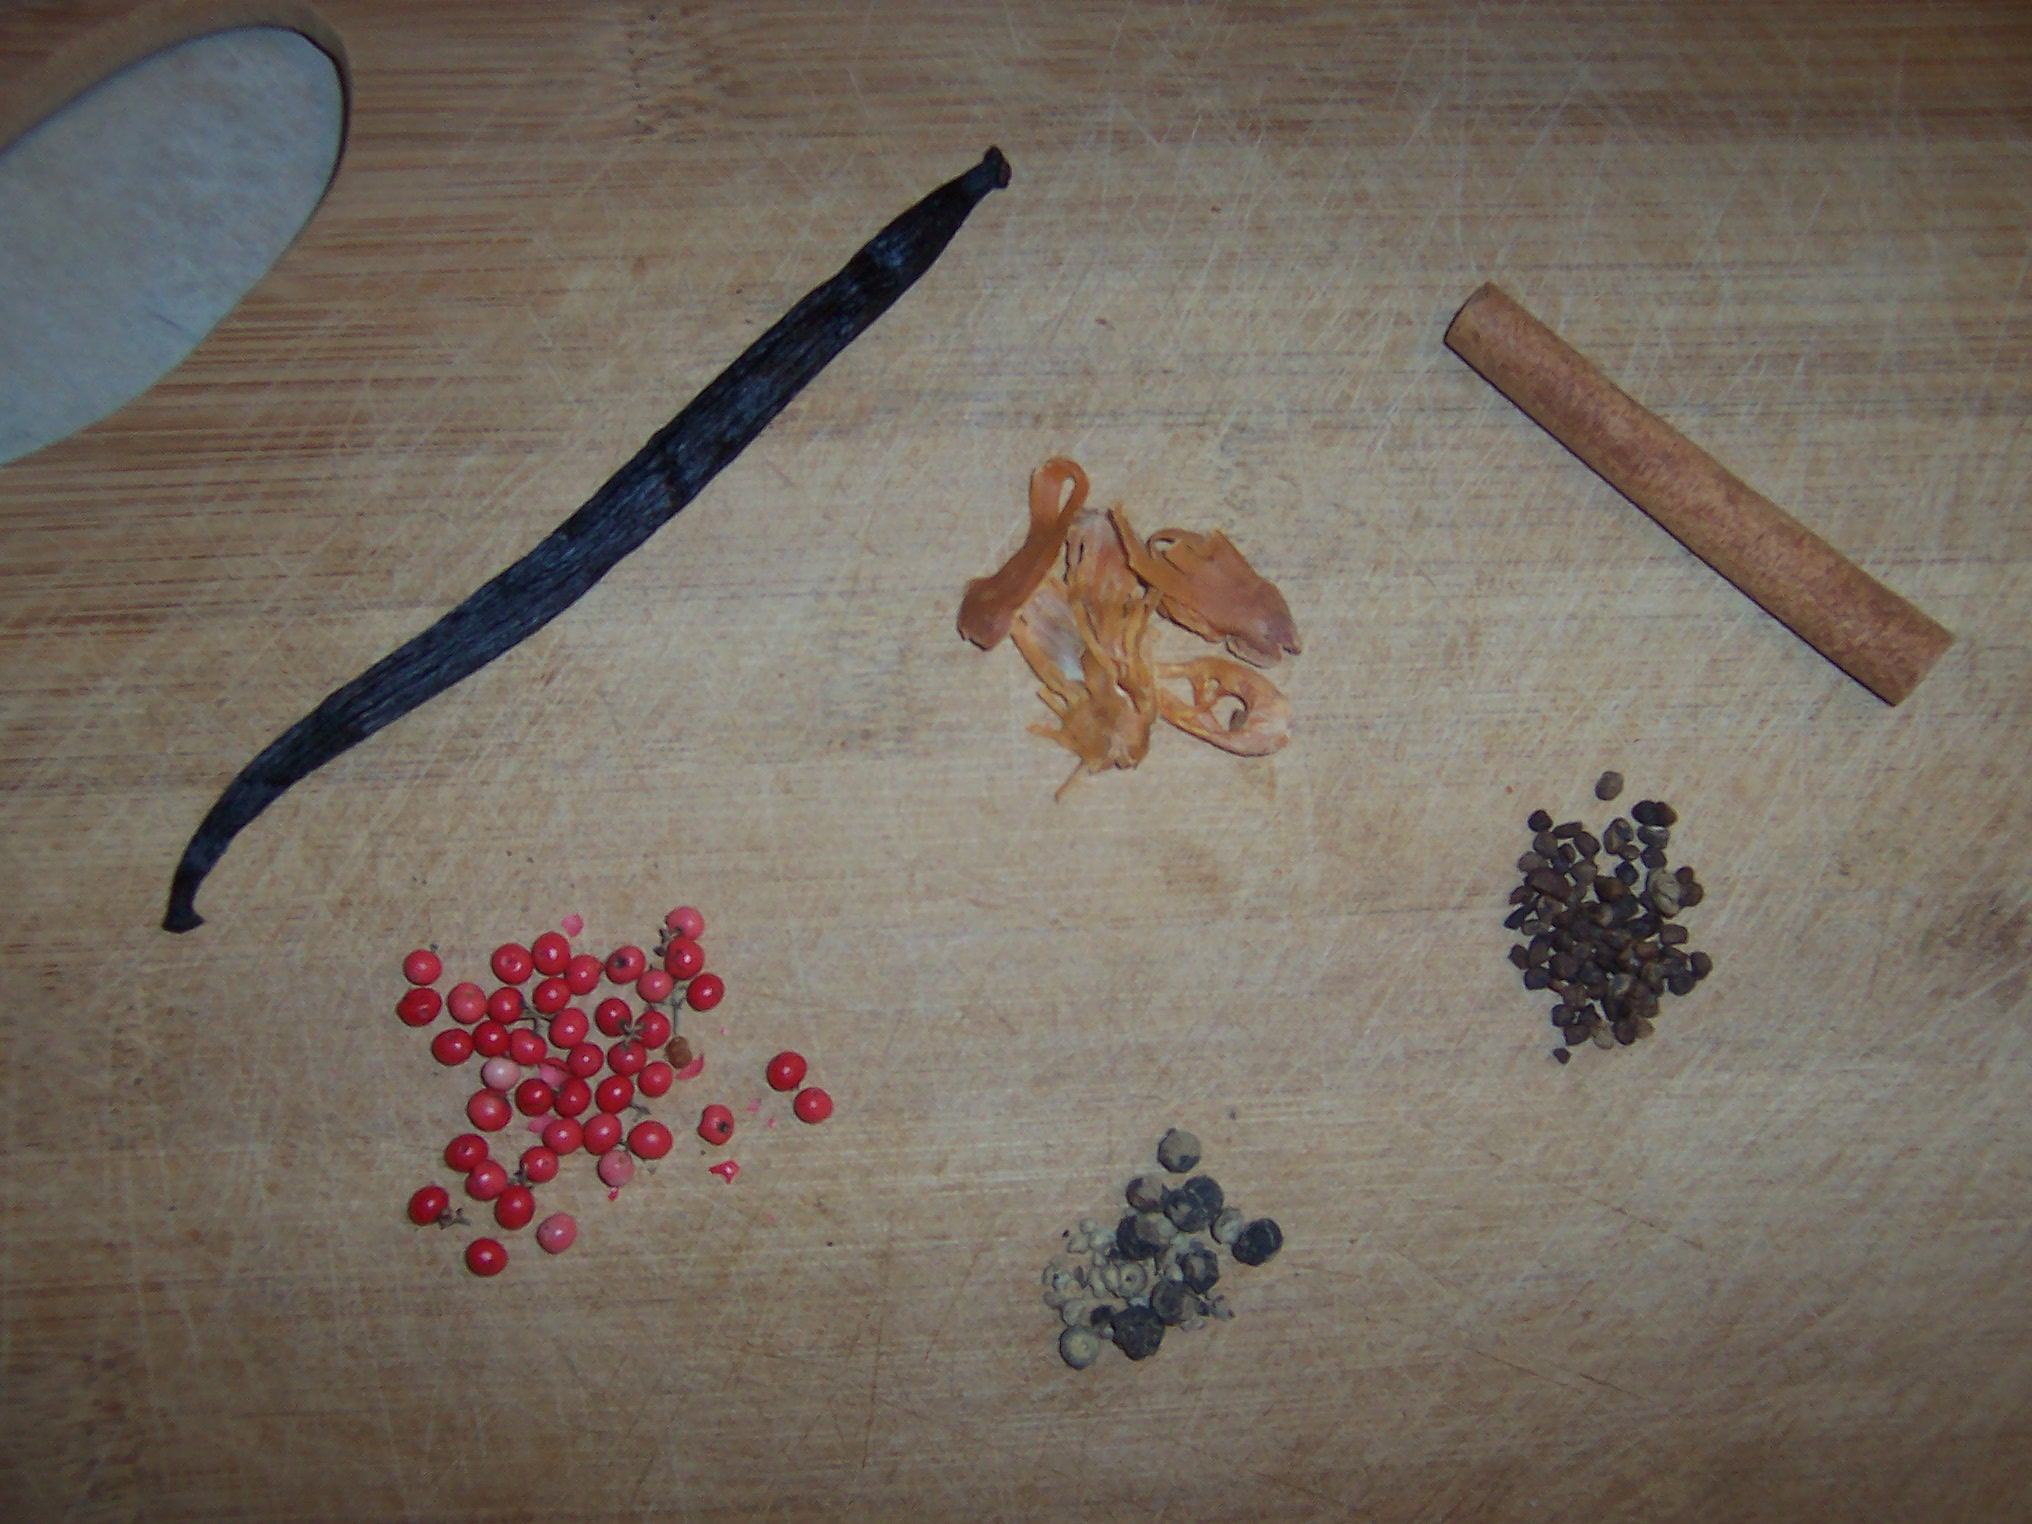
Much to my surprise, this mead has already mostly cleared. So I racked it today, as well as adding a spice packet to it. I thought a lot about what spices to add, and decided to emulate a chai spice (hence the modified name of Chaibernation Mead… heh heh). Specifically, I added a vanilla bean, a cinnamon stick, a few mace husks, cardamom seeds, black peppercorns, and dried red peppercorns:
Clockwise from top left: vanilla bean, mace husk, cinnamon stick, cardamom seeds, black peppercorns, red peppercorns.
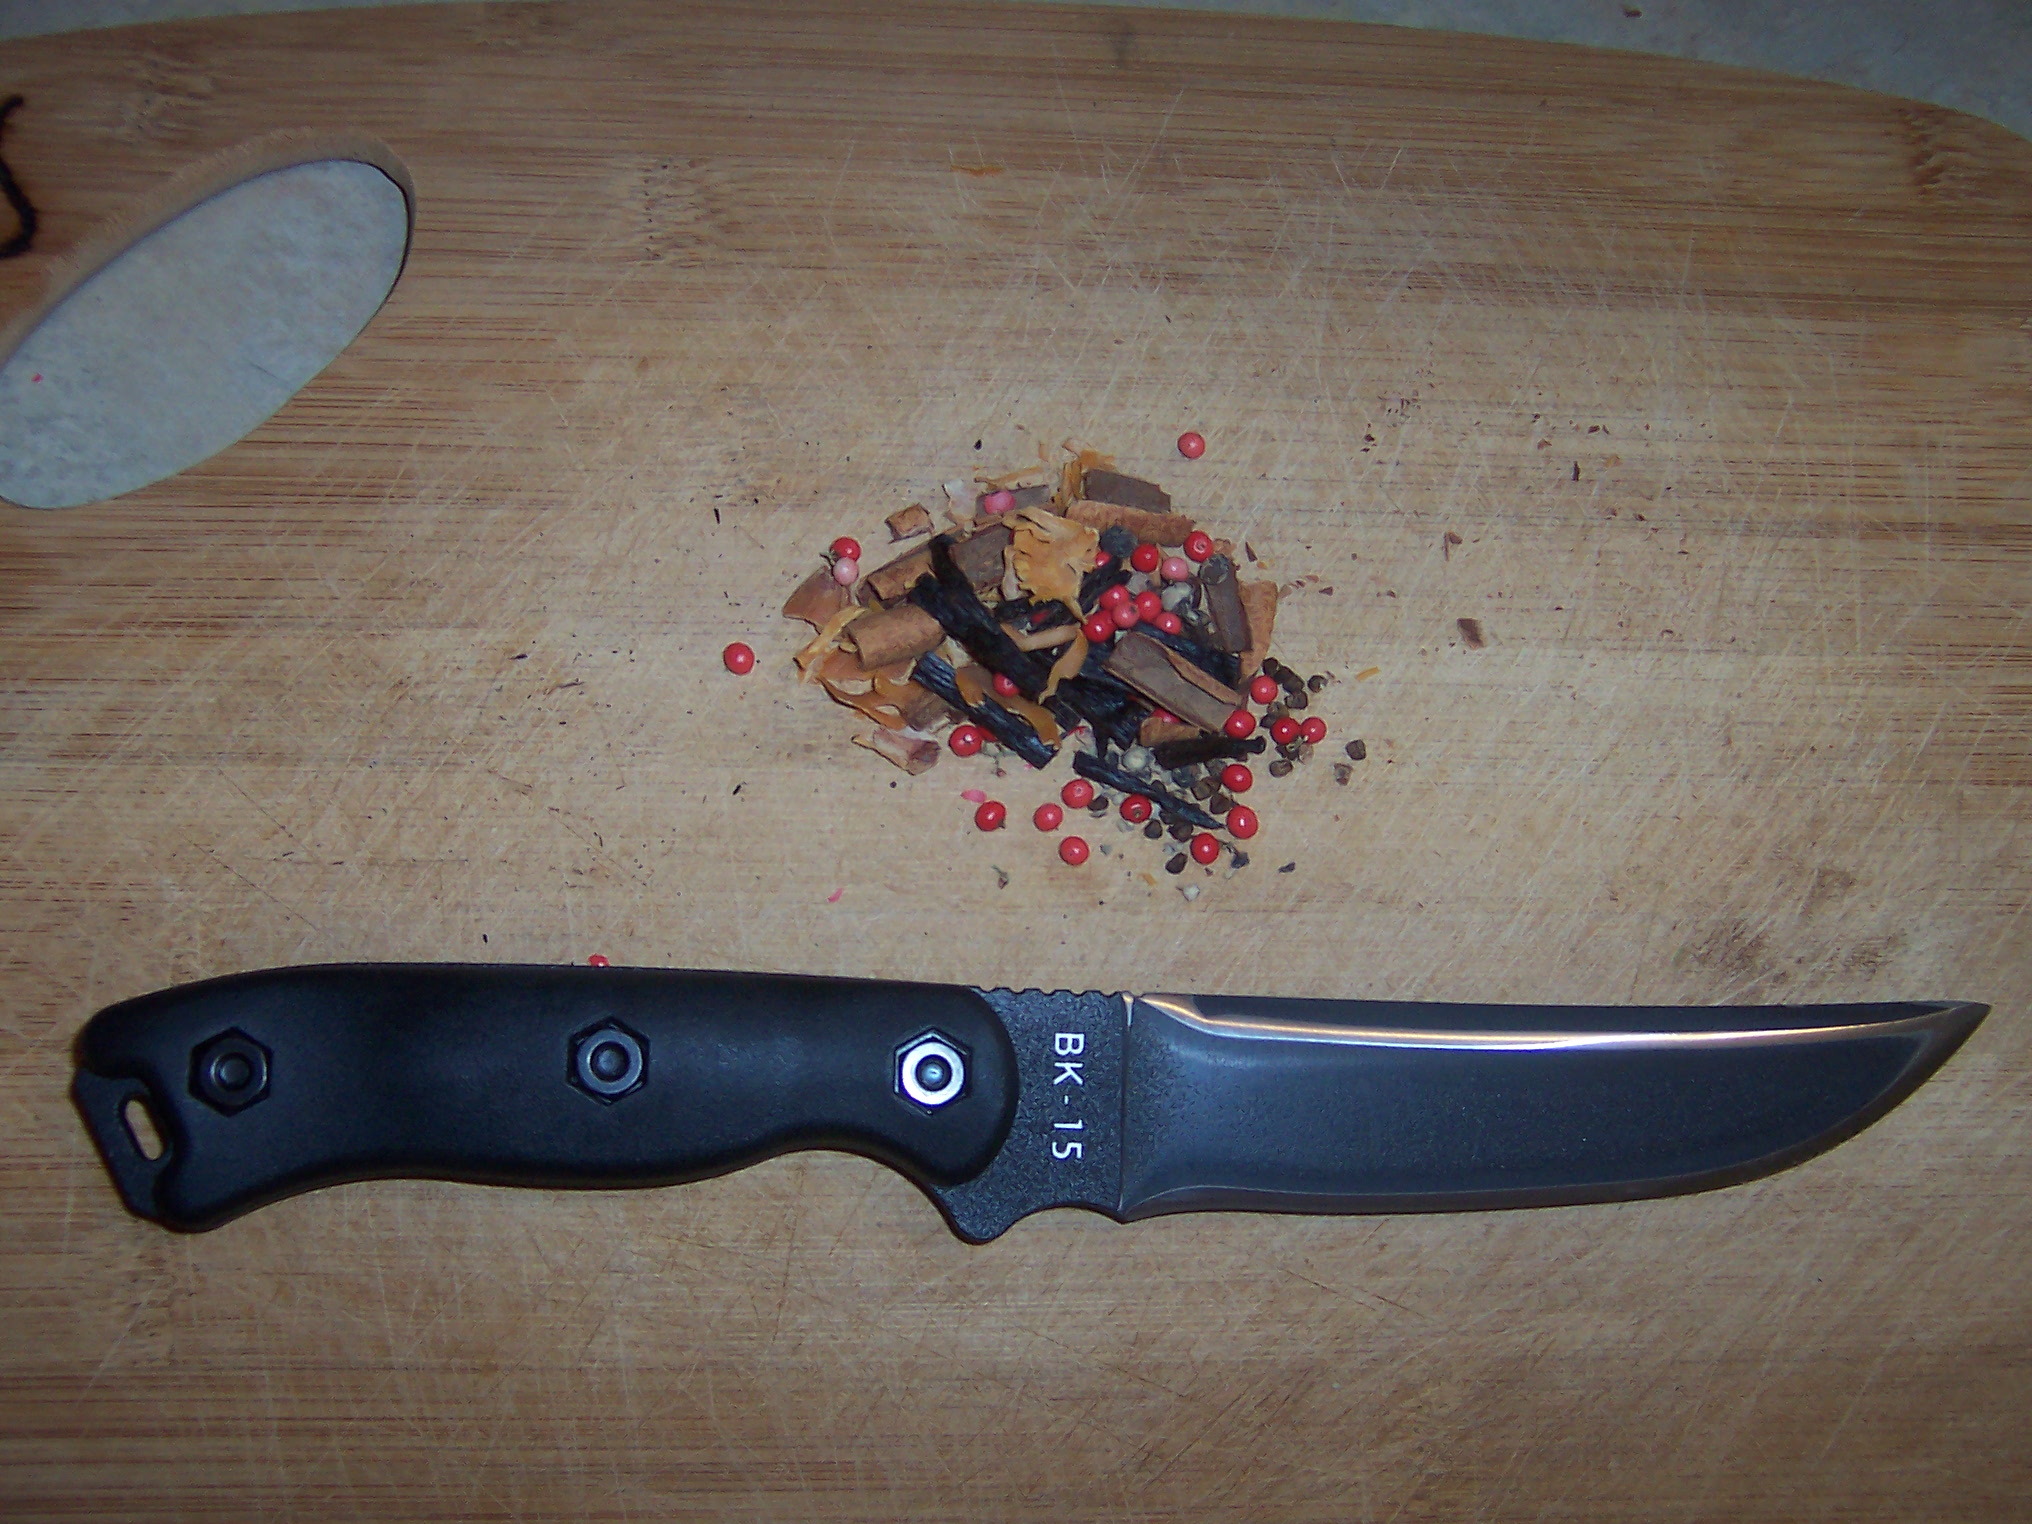
Then I chopped them all up:
spices chopped up with my Becker BK15
And lastly, put them into a sealable teabag (sealed with an iron):
spice bag ironed shut.
I also took a hydrometer reading after I racked it, it is presently 2.5% alcohol potential, which means this is a semisweet mead at 13.5% alcohol. With the spicing mixture it should be great:
Racked mead, with a spice packet floating at the top. Normally I rack into 1 gallon jugs, but all my jugs are full at the moment so I used a spare carboy.
Next step: check the flavor profile on this starting in a couple of days. I don’t want the spice to be overwhelming.
UPDATE: May 23
The spices have been steeping for a week, and wow! Delicious thus far, but I want to let it go another week to let the spice flavor grow a bit stronger and settle in. This is gonna be a good one!
UPDATE: May 31
Tasted it again tonight, and it is perfect! Ready for bottling, which I will hopefully accomplish this weekend. Wow, this is really good! Will get even better when it ages…..
Last year’s Blackberry Cyser (cyser means “apple mead” or mead made with apple cider rather than water) was really good, and I knew I’d be merging apples and blackberries most years moving forward. The apples here where I live in Maine are generally quite tart, in a good way, and the blackberries I pick in my yard give a nice earthy, smooth counterbalance to the tartness of the apples.
I also new that I wanted to use some cranberries we had in the freezer in a cyser this year, to play off the contrasts between 2 different “shades” of tart (apples and cranberries). Originally I thought I’d do them separately, but due to a similar situation as what happened during the Fox Pyment (basically I poured in too much honey), I had to split the batch into 2 smaller batches. There was also a slight mishap during the juicing process, but we were able to recover with some amount of grace.
This is a simple one, with no real herbal ingredients. I did add 3 cups of organic black tea to each batch to provide a bit of tannic acid, tweaking both the pH and the flavor.
It turns out that cranberry and blackberry juice mixed together are gorgeous:
Juice from 1qt of Cranberries and 1qt of Blackberries
I took this, mixed in some honey, and realized I way overshot the honey. I had forgotten that late-season cider is sweeter than normal, so I ended up with nearly 25% alcohol potential. So I split it into 2 batches and proceeded from there. Both batches have similar amounts of blackberry/cranberry juice, but one will likely be a sweet mead (19% initial alcohol potential) and one will likely be dry (16% initial alcohol potential):
One batch (pictured) came in at 19% initial alcohol potential, for a sweet cyser. The other batch (not pictured) came in at 16%, which should yield a dry cyser.
Color on the two is quite similar, as you can see below. First is the dry Black & Cran cyser:
Dry Black & Cran Cyser!
And this is the sweet (mislabeled, it is 19% not 18%):
… and the sweet Black & Cran Mead (mislabeled, it is actually 19% not 18%).
I look forward to seeing how these come out!
UPDATE: March 31
Finally got a round to racking these. The Dry Cyser is now 2%, so it is 14% ABV. The Sweet Cyser is now 4%, so it is 15% ABV. Both different flavors of delicious!
This year, my friends Arthur Haines and Nicole Leavitt from the Delta Institute of Natural History were kind enough to share their Fox Grapes with me and my wife. We split the grapes equally, Lisa Marie making jelly and me, of course, making grape mead, which is also called pyment. I thought about adding some herbs to this mead, but these grapes are so amazing I wanted to let them speak for themselves. Along the way, I had a bit of a mishap and had to readjust. Read on for details.
Fox Grapes (Vitis labrusca)
Fox grapes are native to North America’s east coast, and are one of the precursors to the famous Concord grape (which I used in last year’s Chaga Pyment). However, these Fox Grapes are larger than the feral Concord grapes we foraged last year:
wild Fox Grapes (Vitis labrusca)
After Lisa Marie made her grape jelly, I had about 3 pounds of stemmed grapes to work with:
about 3 pounds of stemmed, plucked Fox Grapes
Once they were stemmed and cleaned, we got out the juicer and I ended up with nearly a half gallon of grape juice:
3 pounds of grapes yielded nearly a half gallon of grape juice.
One thing to know when working with wild grapes is that they contain tartrate, which is a substance that is bitter and can irritate the skin and mucous membranes. If you eat more than a few wild grapes, you are likely to notice a slight burning or tingling sensation at the back of your tongue or the roof of your mouth; this is caused by the tartrate. The solution is to stick the grape juice in the refrigerator overnight, so the tartrate will tend to settle (in crystal form). Note that in mead, the tartrates will settle out during fermentation and end up as part of the sediment…. so I won’t use the sediment from this batch of mead for anything.
Oops! Too much honey!
I started with a strong chaga decoction, and poured the grape juice in with the chaga. However, when I added the honey, I had a mishap, and poured too much honey into the pot, giving me an off-the-chart alcohol potential of about 24%:
Oops! Too much honey, off the charts, nearly 24% alcohol potential.
So I had a decision to make. I could either have a VERY OBNOXIOUSLY sweet mead, or I could split this into 2 different batches. I had an open carboy so I chose the latter course, which of course will weaken the grape flavor a bit. Rather than make 2 more or less identical batches, I decided to make a Strong Fox Pyment with most of the grape juice, and a Weak Fox Pyment with about half of the grape juice. To accomplish this I poured off about a gallon of the oversweet must and set it aside:
About a gallon of the oversweet must poured off into another container, to be used for a 2nd batch of mead
Then, I used the remaining 2 gallons of oversweet must, added more water (and a bit more honey) to get me to a more reasonable alcohol potential of 17%:
Filled it back up to 3 gallons with spring water to get us to 17% alcohol potential. That’s more like it!
I pitched the yeast and poured it into the first carboy. Then I used the 1 gallon (or so) of the remaining oversweet must, put it into my stockpot, added more water and honey to get the Weak Fox Pyment to about 16% alcohol potential:
2nd batch, which will be weaker in grape flavor, up to 16% alcohol potential
I then pitched a second packet of yeast and added the must to another carboy, giving me to similar batches of pyment:
2 are better than one! The Strong Fox Pyment is on the left, with its deeper, richer color
When it’s all said and done, the Strong Fox Pyment should have a darker color and a stronger grape flavor than the Weak Fox Pyment, but they should be quite similar. Time will tell!
UPDATE, Jan 11
I racked the Weak Fox Pyment today, and it is a good dry-ish flavor at 2% remaining alcohol potential, which means it is 14% ABV. It is a lovely light color, crisp with a hint of grapes to it. Almost exactly what I was hoping for! The Strong Fox Pyment doesn’t seem quite ready to rack just yet.
UPDATE, March 31
Finally racked the Strong Fox Pyment. It too ended up at 2% remaining alcohol potential, making it 15% ABV. The color is much darker, and of course the grape flavor is stronger. Awesome!
Elderberries are one of my favorite berries to work with. 2010’s Elderberry Mead was one of my favorites that year (probably a close second behind the Wild Black Cherry Mead). Then in 2011 I made Elder Mead with Reishi and Rosehips accompanying the elderberries, and it was one of the most unique brews I’ve yet done — a serious power-pack for the immune system.
This year, I was able to get 2 quarts of beautiful elderberries from my friend David Homa, who runs Post Carbon Designs and is a Maine permaculture expert. I wanted to feature the Elderberries a bit more strongly this year, so I decided to use chaga rather than reishi due to reishi’s strong flavor profile. The rosehips went well with the elderberries, so I decided to dry a simpler Elderberry Rosehip mead.
I started with a chaga decoction, this time made very strongly after simmering for about 20 hours. Then, I fished out the chunks of chaga so that I can re-use them for tea:
Strong chaga decoction
Then I turned off the heat, tossed in 2 handfuls of rose hips, let it steep for about 15 minutes, then put in the sink to cool off:
Chaga decoction with rosehip infusion cooling in the sink. Note the sunlight through the forest reflecting in the liquid…. :-)
Then, I juiced the 2 quarts of elderberries using our juicer. I was surprised at how much it yielded, about 1.25 quarts of juice:
This is a 1.7 quart container, so I figure this is at least 1.25 quarts of elderberry juice. Maybe 1.4 or so.
Mixed together with enough honey to get it up to 16% initial alcohol potential, it makes for a beautifully-colored wort, as usual with the elderberries:
Elderberries, rosehips, chaga, and honey make for a beautifully-colored must!
As always, I can’t wait to see how this turns out!
UPDATE: Nov 25
Just racked this mead to find a 2% remaining alcohol potential, which means it is 14% alcohol. It’s semisweet, and kind of young mead bitter, but should be excellent when it’s had a chance to age a bit.
For a while now, I’ve been wondering what a tomato mead would be like. I’ve heard of basil being successful in mead also, so I’ve been imagining what some of these flavors might be in a mead. I haven’t quite had the guts to make a tomato mead though.
Until now.
Husk Cherry (Physalis pruinosa)
Husk Cherry (Physalis pruinosa) is a member of the Physalis family, so it is a nightshade and in the tomato family. P. pruinosa is also sometimes called “Strawberry Groundcherry,” “Cape Gooseberry,” and of course “Husk Cherries” (specifically the “Goldie variety” from the seed supplier). Physalis is most known for the husks that surround the fruit:
A single husk cherry with its husk partially removed. This is about the size of a small strawberry.
The husk cherries definitely have a tomato-ish vibe, but they aren’t nearly as tart or intense as a tomato. The flavor is sweeter and lighter, and the overtones are more like pineapple than tomato. Delicious!
Our CSA Farm (Deri Farm in North Yarmouth Maine) happened to have some extra husk cherries this year, so I grabbed up 2 quarts right away, and made sure the husks were all peeled away (thanks LM for the help!).
I begin this batch basically the same way as Mad Trad D, with a good, strong chaga decoction and a staghorn sumac drupe put it for the last 5 minutes of simmer:
Chaga & Staghorn Sumac tea
While the tea was cooling, I put the husk cherries into the high speed blender:
Husk cherries, peeled and about to be juiced
They were whizzed up and strained, and added to the cooled, strained tea:
Husk cherry juice mixed with chaga/sumac tea
Then, I added enough honey so that it would top off at about 16% alcohol (I’m envisioning a drier mead for this flavor):
16% initial alcohol potential.
The husk cherries didn’t color the final must too much, but it looks beautiful, a nice deep brown that will likely fade as we get into secondary fermentation:
Husk Cherry Mead!
I can’t wait to see how this comes out!
UPDATE: Nov 25
Just racked this mead, it’s beautifully gold in color, with 1% remaining alcohol potential, meaning this brew is 15% alcohol. Very nice flavor! It’s dry but you can definitely taste the husk cherries…..
Today is Mead Day! Since 2002, the American Homebrewers Association has designated the first Saturday in August as such. There are many ways to celebrate Mead Day, but I decided to definitely do up a batch of mead. Blueberries are in season, so they are a natural choice.
The wife picked up a bunch of wild blueberries at the farmer’s market today, and man are they gorgeous! I couldn’t decide what to add to it herbally, apart from chaga…. last year I did a Blueberry Nettle Mead and it was ok, but I wanted to experiment with something different. The wife suggested Mullein, saying she had a good feeling about it, and that was one of two herbs I was considering (along with a nettle repeat). So Mullein it was!
Mullein
Mullein (Verbascum densiflorum) is a very striking plant. It has a tall stalk, and its leaves are incredibly big and soft (they make the supreme natural toilet paper when doing one’s bidness in the wild). Mullein has been used by humans for thousands of years:
The name mullein itself is derived from the Latin word “mollis” which means soft. It has its origins in the Mediterranean, but has been naturalized in North America. The flowering stem was dried by the Greeks and Romans and dipped in tallow, and then used as a lamp wick or as a torch.
The soothing mucilages of mullein coat sore throats and make coughing more productive. The German E Commission relates that mullein is good for catarrhs of the respiratory tract and as an expectorant.
So I began as I always do, with a chaga decoction, letting 2 gallons of water simmer overnight to make a thick, dark tea. When I turned the heat off, I added 3 black tea bags and a few handfuls of dried mullein leaf:
Chaga decoction, and black tea/mullein infusion
I let this steep for about 10-15 minutes and then began cooling it, using my new favorite cooling method of putting the stockpot into the sink and filling the sink around the stockpot with cold tap water. I drained the water and refilled it once, and it was down to blood temperature after about 20-30 minutes:
Cooling the Tea
Once the tea was cool, I strained it and set it aside for a bit.
Next were the blueberries. In the past, I’ve used as little as a pint, and more often a quart, of berries in my meads. This time I wanted to try a higher concentration of berries, so I used 3 pounds (about 2 quarts) of fresh, wild blueberries. I blended them a quart at a time in my VitaMix high speed blender, poured them into the stockpot, and then added a bit of the tea in the blender, and whizzed that too to get as much of the blueberry goodness as possible:
Whizzing the last bit of blueberry goodness out of the VitaMix
I then added the tea, and enough honey to get us up to 19% initial alcohol potential, and mixed it up well:
Spring water, honey, blueberries, chaga, mullein, black tea mixed together. 19% alcohol potential
Then I pitched the yeast, transferred everything to the carboy, shook it up, and labeled it, leaving a beautifully-colored carboy full of mead-to-be:
There are a lot of blueberry skins in tiny bits; between that and the double-blueberry load I expect a lot of sediment in this batch. Time will tell…..
Happy Mead Day to all of my readers!
UPDATE: 4 hours later….
In case of emergency….
Well, this hasn’t happened in a while. 4 hours in, it foamed up pretty vigorously, clogging the airlock. (I would have taken a pic of it, but my wife had already cleaned it by the time I got the camera. :-)Â I’m glad she caught it when she did!
To review for my readers, if I hadn’t have removed the airlock the pressure would have continued to build and eventually popped off, making a MUCH bigger mess. As it was, I set the carboy outside, just outside the visible door here — I usually start my ferments near the door for exactly this reason, I can aim the carboy outside if it really starts to shoot, which has only happened once so far.)
Then, stuff the opening in the rubber stopper where the airlock goes with your siphoning hose, and put the other end of the siphoning hose into a bucket of water, making sure the other end of the hose is always underwater. This duplicates the airlock, but gives the bubbles/foam space to blow off without making a mess or building pressure.
THOSE OF YOU MAKING MEAD WITH 2 QUARTS OF BERRIES, TAKE NOTE. THIS HOBBY CAN BE MESSY. :-D
UPDATE: Sept 20
I just racked this mead. It is 6% remaining alcohol potential, which means this brew is 13%ABV. The blueberry flavor really comes through strongly! Once this ages it will be fantastic. It’s a gorgeous dark color….