It’s been a few years since I’ve made spruce mead, and it’s one of the more popular brews I do. I knew I’d do another batch this year, and when I tasted the Pine Barren honey from Fruitwood Orchard in New Jersey at The Honey Exchange, I knew I’d found the honey I’d use for the next Spruce Mead.
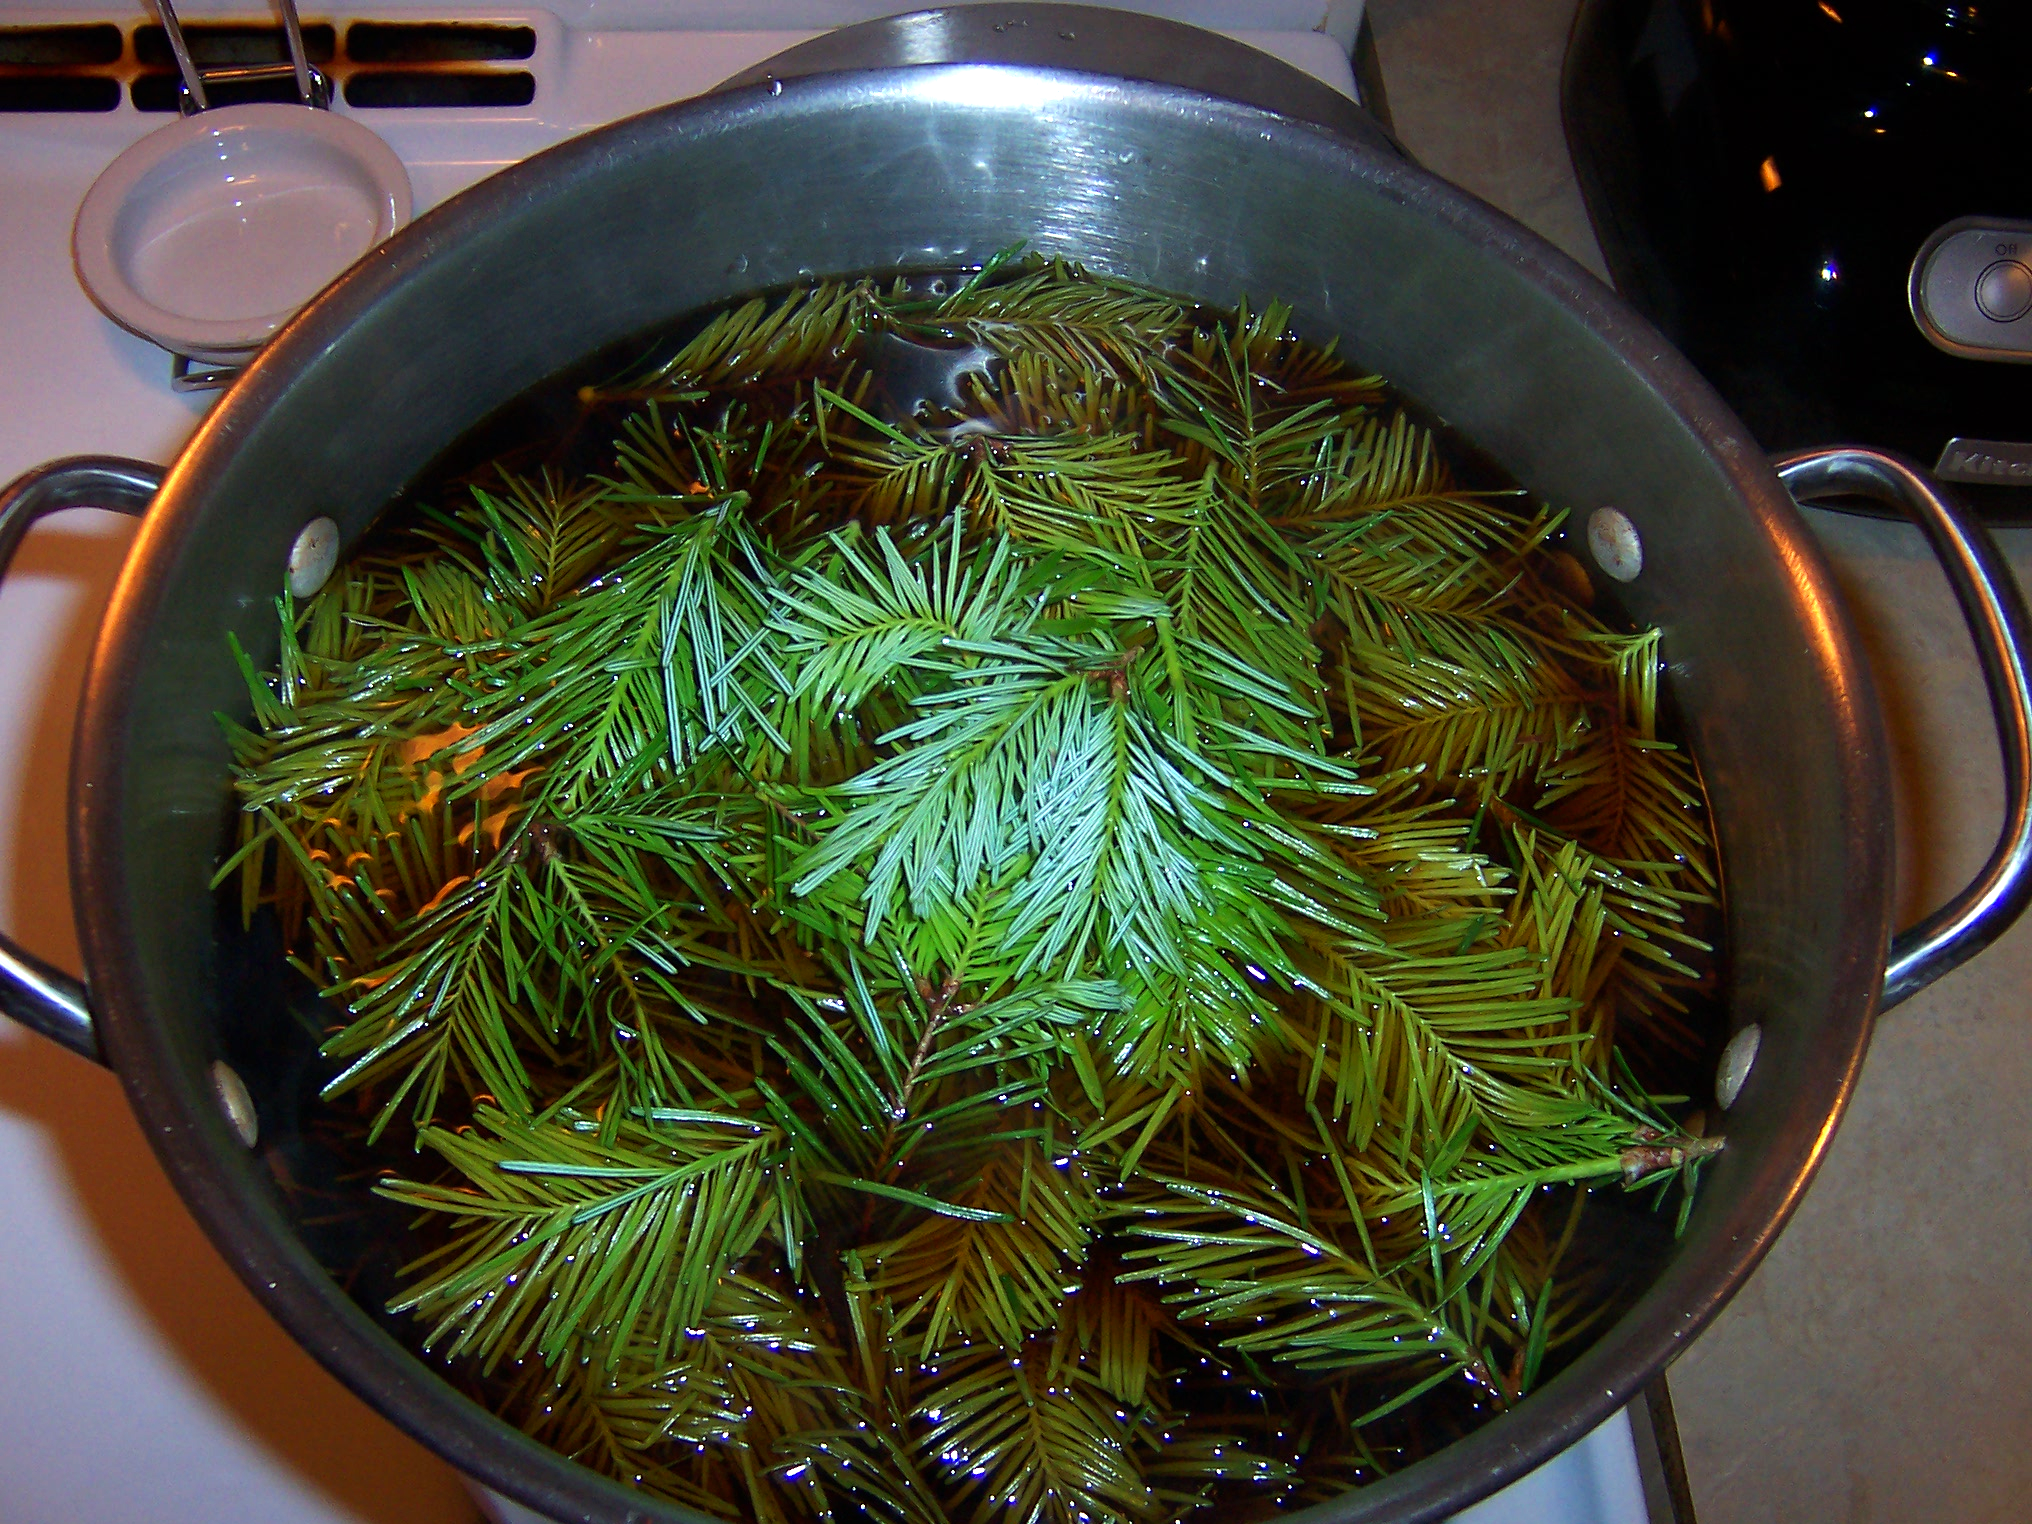
As I did last time, I began with a chaga decoction using some fresh spring water after a trip to the spring where I was enchanted by fireflies, the most I’d ever seen in Maine. Last time the chaga went beautifully with the spruce, so it’s worth repeating the recipe. After the chaga had been simmering for about 12 hours, I went out and harvested some new spruce growth, a bit beyond the “tips” stage, as they were last year:
Freshly harvested spruce tips, harvested a bit later this year so they are more opened up.
When I brought the tips in, I rinsed them off and dumped them in with the chaga, to make a delightful-smelling herbal tea:
Spruce tips in with the chaga decoction for the last few minutes.
After the tips sat in the tea for about 30 minutes I strained it and let the tea cool down overnight.
The next day, I went to mix up the mead, starting with the pine barren honey and a little extra Maine wildflower honey. The Maine wildflower honey had crystallized, so I let them mingle together for a bit before adding the tea and dissolving:
Two kinds of honey: New Jersey Pine Barren mixed with Maine Wildflower.
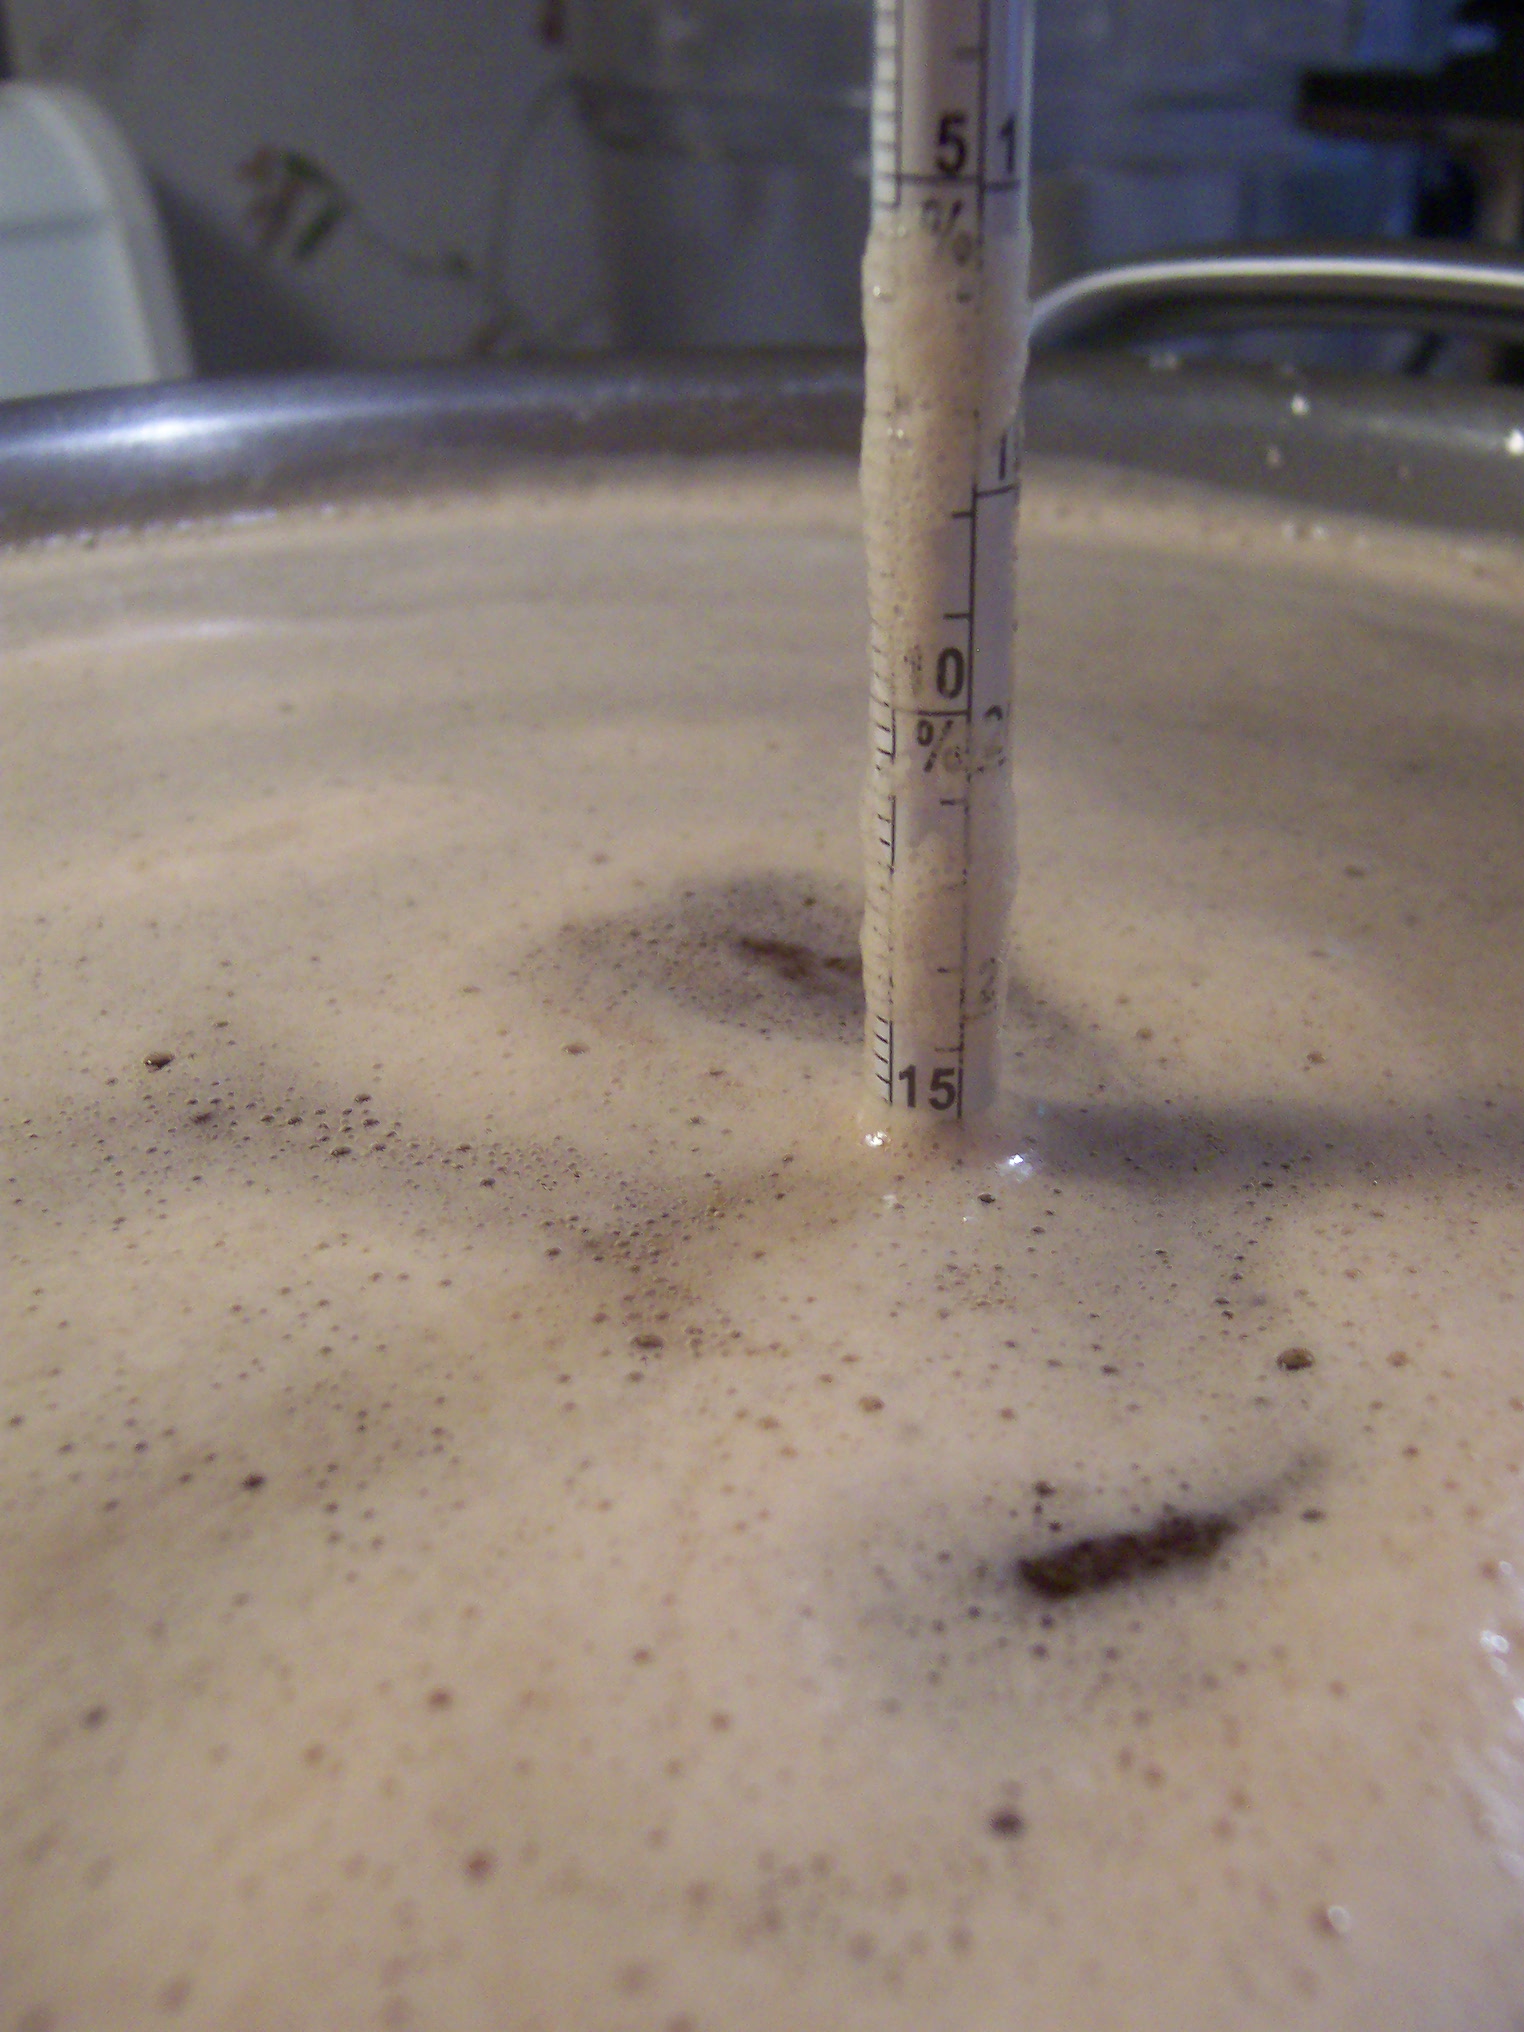
After some elbow grease and stirring, I had a beautiful must ready to go:
The honey all dissolved in the tea, to a 17% initial alcohol potential.
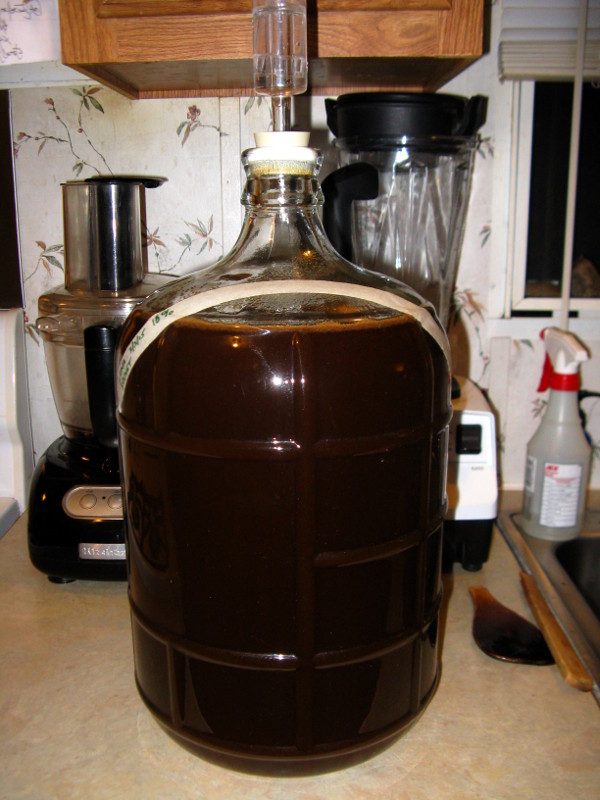
I have 6 gallons in their new mini-ecosystems for fermentation:
6 gallons of Spruce Mead ready for fermentation.
I expect this batch of spruce to be as good as previous ones. It’s not my favorite tasting one (probably the traditionals or maybe some berries are), but this might be the most potent brew I do, since so much of the flavor comes right out of my immediate ecosystem — the spruce trees in my yard.
“The Wolves Pursuing Sol and Mani” by John Charles Dollman (1909). Public Domain via Wikimedia Commons.
After finishing up the Luna Bochet yesterday, I still had some honey (not caramelized) and some chaga/sumac tea left over, so I thought I’d make up a quick traditional mead. Since today is the full moon, I thought I would name this batch after Mani, who is the Norse personification of the Moon.
I have been fascinated with Mani for some time, since I started studying the old Norse stories, mostly because Mani is male. Most other traditions depict the moon as female, which has become so familiar to me over the years that the idea of a male moon seemed strange. Interestingly, Mani’s sister, Sol, is the personification of the Sun, again going against what I had gotten used to in most other traditions with a male sun and a female moon.
The last of my honey bucket was quite crystalized, so I began by melting the honey a bit under some gentle heat, so that it would dissolve more quickly:
Maine Wildflower honey liquifying under gentle heat.
Once it was liquefied, I added the remaining chaga/sumac tea, then added a bit more water and honey, to get myself up to an 17.5% initial alcohol potential:
Honey, chaga/sumac tea, and water, mixed to a 17.5% initial alcohol potential.
As I stirred, I could see symbols and shapes coalescing and dissolving in the thin layer of foam on top of the must. These swirls look almost like animations, and there are stories hidden within them.
Once the mixture was complete, I pitched the yeast, poured it into the carboy, shook it up, and now I have a batch of wonderful traditional mead, which has become my favorite kind of mead over the past few years:
Máni Trad Mead. This should be another great one!
For several years now, I’ve had my eye on doing a bochet, which is a mead made with cooked, caramelized honey. Note that this contradicts my meadmaking methodology for the most part — I am not an advocate of heating honey. There are too many wonderful things in honey that I don’t want to kill with heat, but the allure of the rich tones of flavor with a bochet was too much temptation. I had to try it.
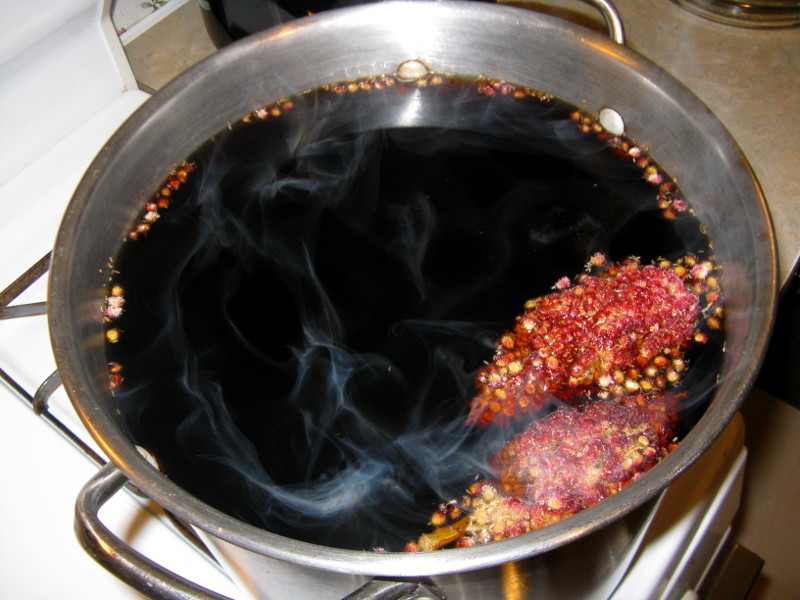
Of course, I began with a chaga decoction in spring water that I let go for about 18 hours, tossing in a couple of staghorn sumac drupes for the final 15 minutes or so:
When the decoction was finished I strained it into an empty carboy, and cleaned out the stockpot for the process of cooking the honey.
Caramelizing the Honey
This is a tricky process. Honey, when it cooks, expands to nearly 3x its volume, so I had to make sure my 3 gallon stockpot had less than a gallon of honey inside. It is also essential to stir the honey constantly so it doesn’t burn. It’s a long process; I decided to cook the honey for about an hour. A small ordeal offering was in the works, during the cooking process a small amount of boiling honey splashed onto my hand and stuck to the skin, leaving a blister. Ah well; a gift for a gift.
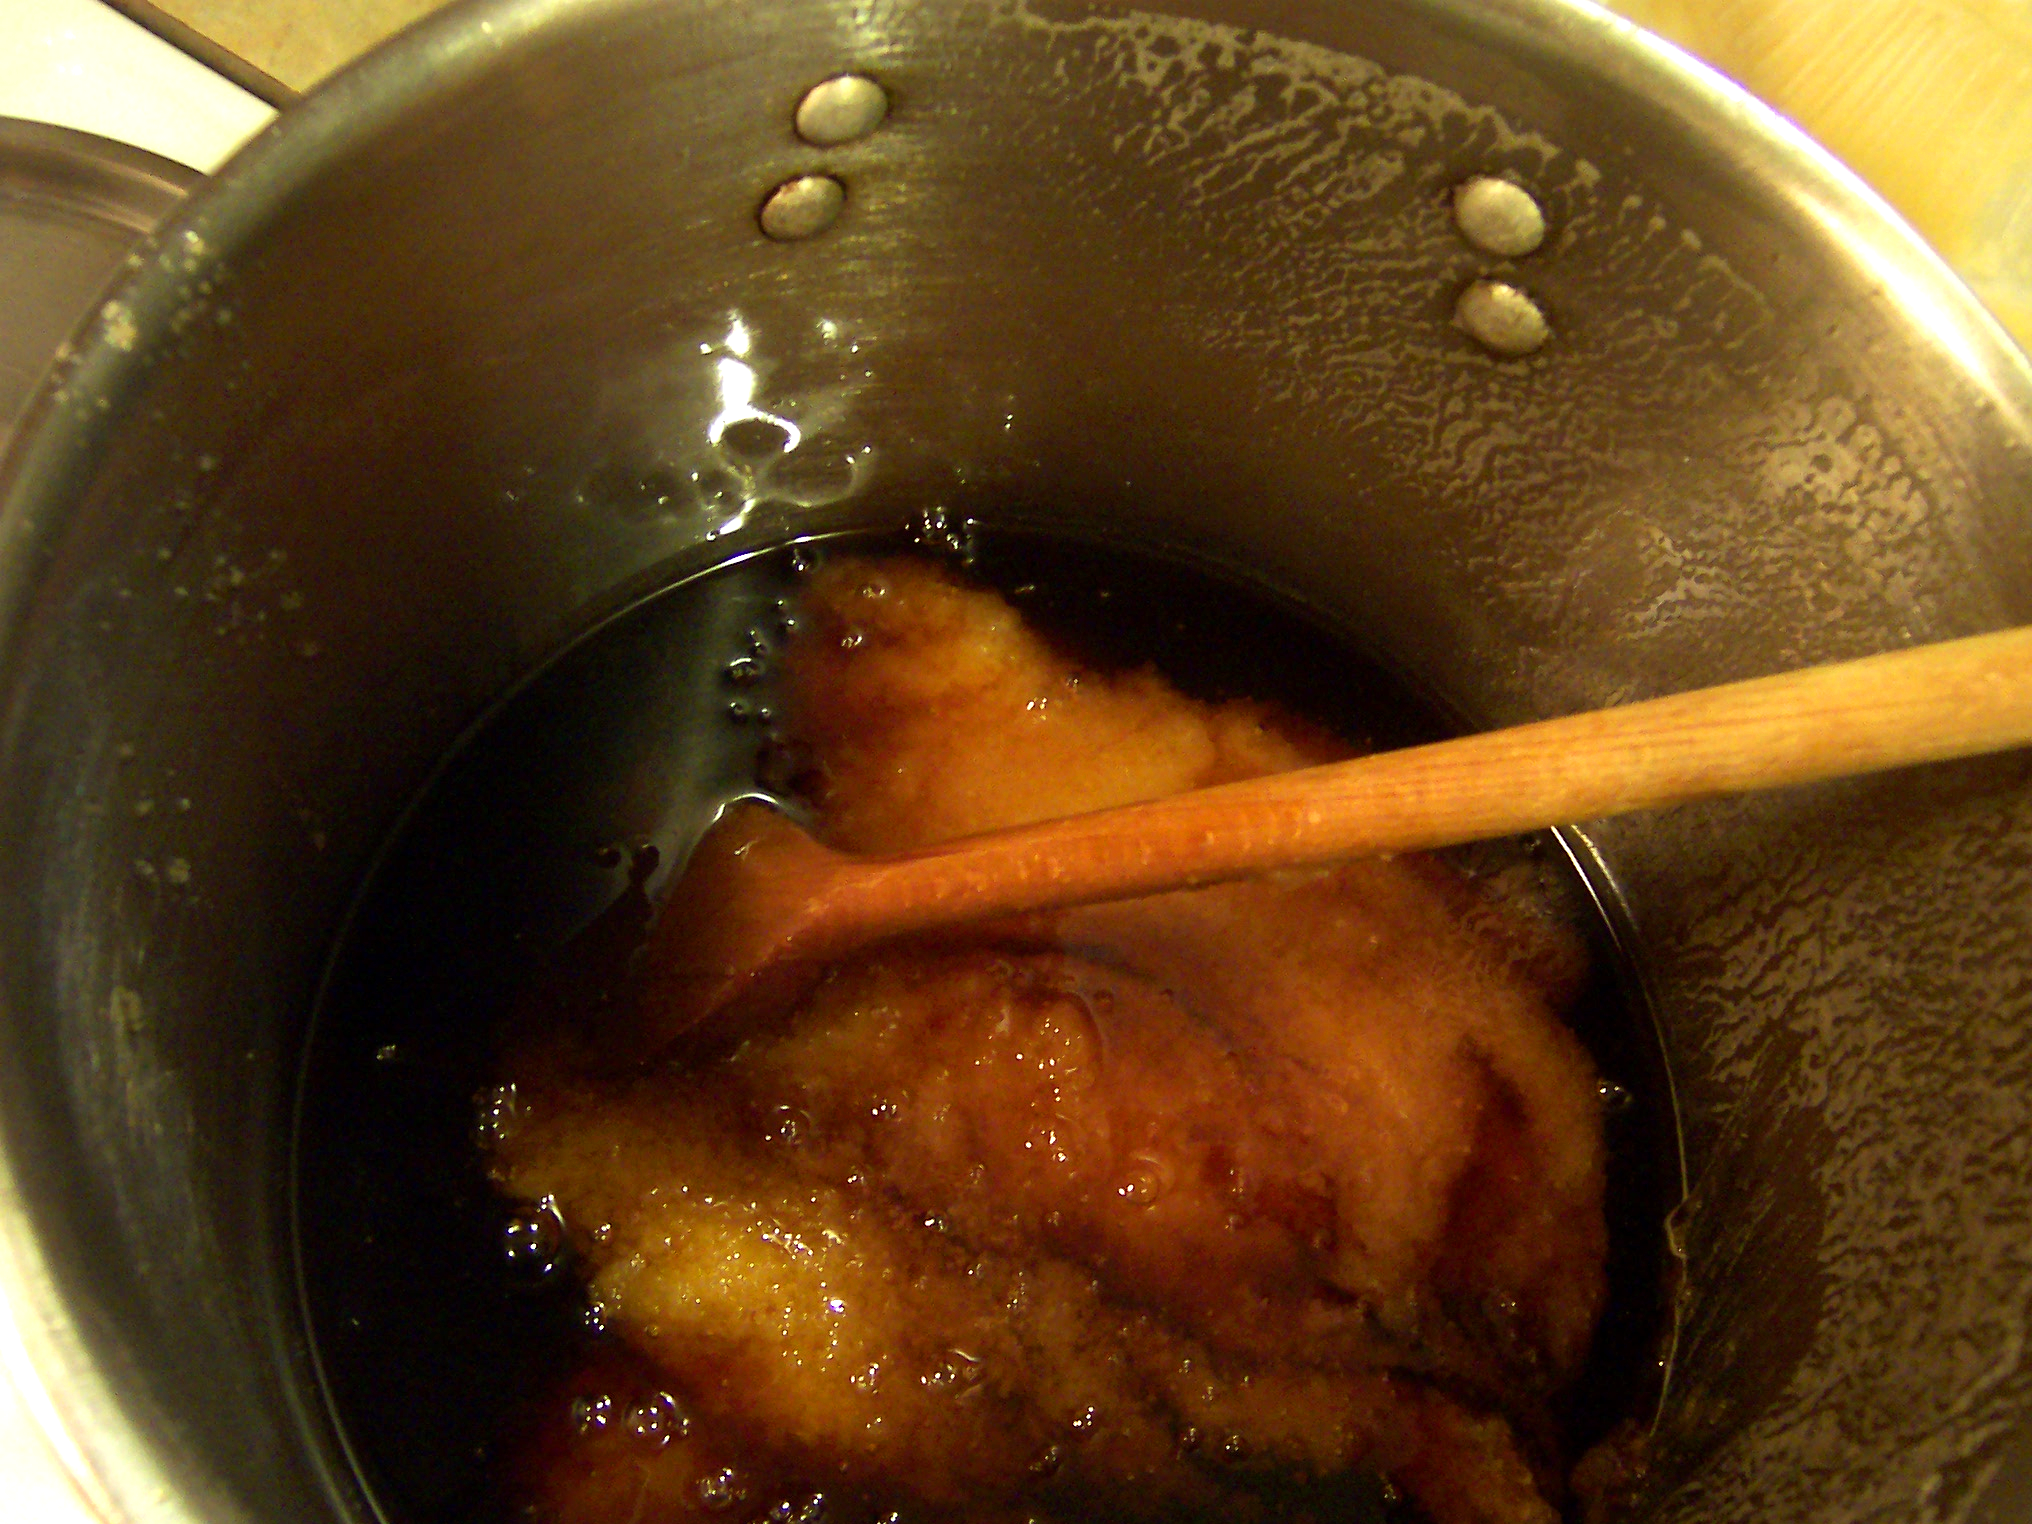
I began with solid, crystalized honey, getting it into the pot to heat up and start melting:
Honey melting in a 3 gallon stockpot. For bochet making, be sure the pot is less than 1/3 full to allow for the honey expansion.
As the honey heated up under gentle heat with regular stirring, it would start to foam a bit at the top. Just keep stirring:
Melted honey. Just keep stirring, and watch it expand, like magic, to 3x its original size!
Once the honey hits its boiling point, things start to happen very quickly. This is where it is most important to keep stirring, so as not to scorch the sugars, and the honey expands 3x to fill the pot within a matter of a few seconds. Do NOT leave this unattended! You could have a huge mess on your hands.
Boiling honey, expanded to 3x its normal volume
Once the honey is at this point, the real work begins. It’s important to CAREFULLY monitor the temperature of the flame and keep stirring. For an hour. Don’t let it stick or boil over. The sugars in the honey will begin to caramelize. Every 20 minutes, I took a sample of the honey:
Honey samples taken every 20 minutes, starting with the honey just when it started boiling at the top, then clockwise every 20 minutes, with the bottom left after a full hour of caramelization.
It was interesting to follow the flavor development as the honey caramelized. In some ways, the first sample taken 20 minutes in had the most intense flavor; it seemed to mellow out and get richer as it aged, finally the bottom left, fully caramelized honey was wonderful.
At the end of an hour, I turned off the heat. The honey then contracts pretty quickly, within a few minutes. Very important — if you let it cool completely, you will end up with extremely thick honey many compare to roofing tar. Therefore it is important to add your liquid before you get to this stage. In my case I added the chaga/sumac tea, which was still warm. Adding hot water helps the mixture to not splash as much when you are adding the liquid:
Adding my hot tea to the honey that has started to cool a bit. Very important to poor slowly, and keep stirring, to avoid bubbling and splashing.
I added 1 gallon of the warm tea (I’m saving the rest to finish off this batch, and to do another batch of plain traditional mead in the next day or two). Then, I VERY SLOWLY added some cool spring water, to get me up to close to 3 gallons.
Normally at this stage I would take a hydrometer reading to see where I am in terms of alcohol potential, but the mixture is still far too hot. Therefore, it went outside under the snow (with a lid on), and under the full moon behind the clouds. Within a couple of hours, it had cooled to blood temperature:
Living in Maine has its advantages when you need to cool off a must.
Finally I brought it back inside, adjusted the final levels to get me to an 18% initial alcohol potential, pitched the yeast, poured it into the carboy, and was left with this utter thing of deep brown loveliness:
Luna Bochet, at an 18% initial alcohol potential.
Needless to say, I’m extremely excited to see how this one comes out in a few months! Hail!
It goes without saying that springtime is a season of rebirth. We are right at the end of this year’s spring thaw; there is still some snow on the ground (that actually came in quite handy today), and the mud is starting to harden up.
The onset of spring is particularly evident to a gardener, to one who works with the Earth in its fecundity to sustain the family and the tribe. My Uncle John was a gardener (among many other things). Uncle John passed away this morning (while the chaga sap decoction was simmering on the stove), and I’ve named today’s mead after him. Mead is a bridge to the past and the future. Humans have been making mead as far back in history as we can see, and a bottle of mead preserves its ingredients for posterity and future nourishment. Today, as I make mead, I am thinking of John. He was a good man, a beacon of kindness in his family and his community. Today my heart is with him, with my family, and with those who loved him. Hail!
It is sap season here in Maine, so I’m going to start with several gallons of freshly harvested maple sap from one of my wife’s coworkers who lives nearby. Apart from using sap instead of spring water, I am more or less replicating what has become my favorite mead recipe, Mad Trad D.
I did a long chaga decoction in 3 gallons of the sap, letting it go for almost 18 hours, with 1 sumac drupe infusing at the end (off the heat). Unfortunately our sink stopper seems to have abandoned the premises, so I had to improvise on cooling down the tea:
Cooling off 3 gallons of hot tea, Spring-in-Maine style
As you can see, I used one of the last patches of snow in the shade to cool the tea and it worked beautifully. After the tea was cool, I started the double batch, pouring half of the cooled, filtered tea into my 3 gallon stockpot:
half of the tea in the stockpot, saving the other half for the next batch
I mixed in enough of the new bucket of Maine Wildflower 2013 honey I picked up recently to get to 18% alcohol. 2013 was a tough year for Maine apiaries, but this honey is fantastic. Some honey has an overtone of tartness to it, but this honey is much smoother than that, reminding me of smoke & caramel.
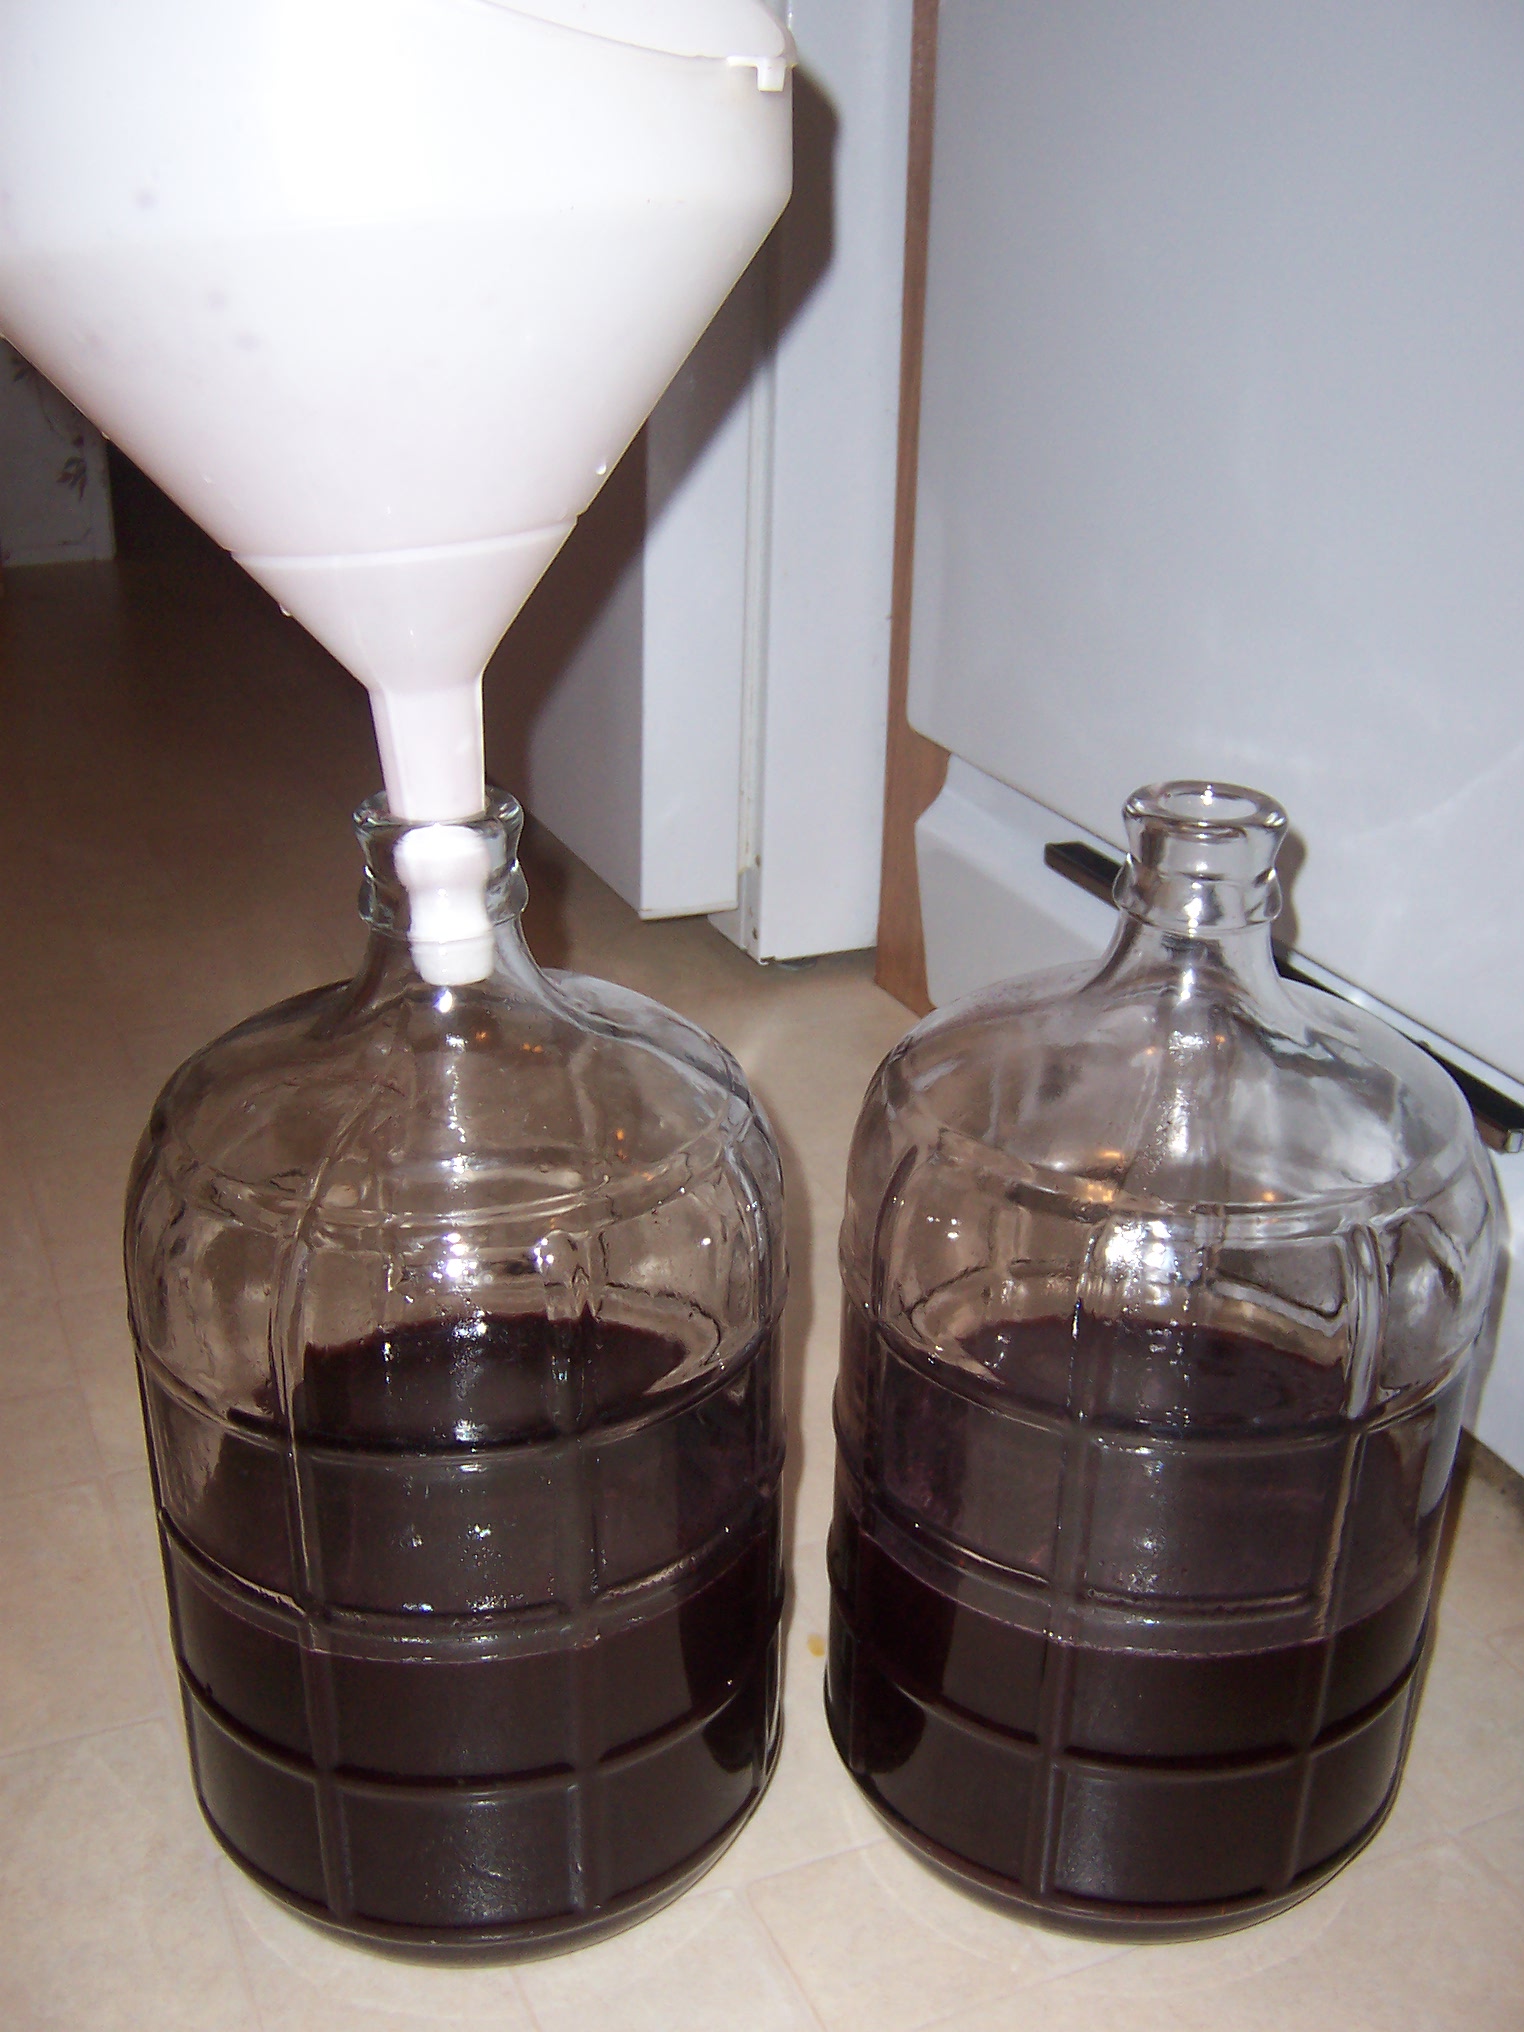
When the first batch was mixed up, mixing the 1.5 gallons of tea, with extra sap and enough honey to get to 18% alcohol potential, I split it equally into the 2 carboys, each with Red Star Montrachet yeast inside:
The first of 2 batches, 3 gallons each, was split between 2 carboys
Then I mixed up the second batch to 18%, and poured it into the 2 carboys to top them off. The must (sugary liquid that will become mead) tasted fabulous, almost like a syrup. This should make an outstanding mead, which is no surprise. Uncle John was a great fermenter, and made the best pickles (cucumbers and onions) from the vegetables he’d grown himself. Therefore another fermentation dedicated to John is sure to come out spectacular.
I look forward to some time in the coming years when I gather again with John’s branch of my family. I will bring some of John’s Springtime Traditional Mead to share with them on that day, so that we can raise our glasses to John and remember him. Hail!
UPDATE, April 18: Stuck Fermentation
After these 2 batches had been sitting for several days, there still was no sign of fermentation; the airlock wasn’t moving at all and there were no tiny CO2 bubbles rising in the must. This is called a stuck fermentation, and it had never happened to me before!
After doing some research, I am pretty certain that the fact that the sap I used was cloudy is the culprit. This indicates the presence of microorganisms in the sap, and most likely they were interfering with the normal yeast activity. Cloudy sap is normally dealt with by cooking it down normally into maple syrup, where the cloudy sap produces Grade B Maple Syrup with its associated richer flavor reminiscent of caramel and molasses, and the presence of many more minerals.
As my regular readers will know, I do not recommend boiling the honey-liquid, the “must,” but in this case there was little choice. I emptied one of the carboys back into my stockpot, carefully brought it to a boil to kill off any microorganisms (including the yeast I’d pitched), cooled it down to blood temperature, and put it back into the carboy with some new yeast. Voila! This morning it was bubbling away normally! Great news.
Today I will take care of the other batch in the same way.
UPDATE: August 11
I racked the mead today, and it came out at 3% alcohol potential, which means it’s 15% ABV and sweet. It has a maltier flavor to it, presumably from the fact that the mead was boiled. This mead is already quite clear, so I will be bottling it soon.
I’m really looking forward to this event for a lot of reasons, but the main one is in working with all the incredible varietal honeys that they have available! I’ve always used high quality local honeys, but The Honey Exchange gives me (and you!) access to much more exotic honeys for use in fermentation.
As always, this workshop will include:
A talk on the Lore, history, cultural, and nutritional aspects of mead
A copy of The Lore And Craft of Mead eBook
A demonstration as I brew up a batch of mead
An (optional) opportunity to acquire your brewing gear and make your first batch of mead under my supervision, keeping both the gear and the mead you make!
Registration for the workshop is $50. The (optional) brewing equipment kit is $75, and you can choose from the varietal honeys available.
I’ve noticed that in 2013, apart from doing fewer batches of mead overall, I’ve been dialing in and reproducing some of my favorite recipes from the past. I’ve spent several years experimenting with smaller batches, but this year I feel like I have some favorites dialed in, and am making more double-batches. I did this with the recent Mad Trad D2 mead, where I took my favorite sub-recipe from the Mad Trad Trial and made 6 gallons of it, rather than 2 different 3 gallon batches.
I’m doing the same with this batch; basically I’m reproducing last year’s Double Blueberry Mullein and making 2 batches of it. As previously, I made a strong chaga decoction, added black tea and a fistful of mullein at the end, and strained it. I had 5 pounds of blueberries, so each batch will get 2.5 pounds (it got 3 pounds last year). Also it is starting at 18% initial alcohol potential, rather than the 19% from last year which turned out to be quite sweet. It was one of my favorite batches from last year, so I hope this year’s turns out as well!
Logistically I tried something a bit newer as well. I didn’t carefully measure the blueberries to make sure each batch got exactly half; in addition, I was down to the end of my honey bucket so I wasn’t sure each batch would get the same initial alcohol potential (though as it turned out, my estimating was spot on!). Therefore, I decided to split the first batch among the 2 carboys, like this:
first batch of Double Blueberry Mullein, split among 2 three gallon carboys
Then, I mixed up the second batch, and topped off both carboys. As always, the rehydrated yeast went in to each empty carboy first.
As it turned out, both batches came out exactly at 18% initial alcohol potential, so I’m not really sure this step was necessary, but it should make both batches much more similar.
In the end, I have 6 gallons of what will become another beautiful blueberry mead:
6 gallons of beautiful blueberry mead
May this batch turn out as good — or better — than last years!
UPDATE: 15 December
I racked the mead tonight, and it is still wonderfully dark but mostly clear. It is semisweet, at 2% remaining alcohol potential, which means this brew is strong at 16% ABV. Definitely less sweet than last years. Already nice, but is dry enough to have a bit of bite that will surely mellow out over time. Success!
UPDATE: 21 March 2014
I have officially decided to re-name this batch Blueberry Bite Mead. :-)
On Wednesday, August 7 at 10pm Eastern Time, I will be interviewed on Wyrd Ways Radio, a show on heathenry and polytheism hosted by Galina Krasskova. We’re going to be discussing craft as devotional work, the place of mead in Northern Tradition lore and ritual, and, basically, all things mead. We’ll also be opening up the phone lines and taking calls.
Tune in to paganstonight.com to listen and chat live, call in to the show at 347-308-8222, or if you miss the live show, get it archived on iTunes.
I’m very much looking forward to this one.
UPDATE:
The show is archived here. The interview with me begins at about 71:30 into the podcast.
It’s June, therefore it’s time for anotherstrawberrymead! This year I wanted to have a stronger strawberry flavor, to be a bit drier than past years, and to simplify the herbal process.
I started with a decoction of chaga and a sumac drupe, cooled and strained back into the carboy:
1.5 or 2 gallons of chaga/sumac tea
Next, I used double the amount of strawberries relative to last year — 2 quarts, which weighed 3 pounds – that were lovingly (and knee-achingly) picked by my wife and daughter this morning:
2 quarts/3 pounds of freshly-picked strawberries
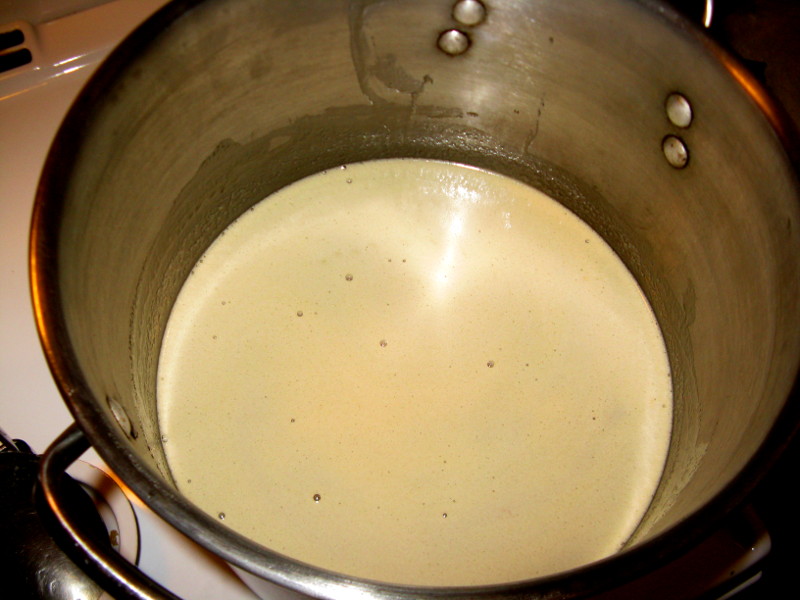
Next, I juiced the strawberries in our juicer, which created about a quart and a half of strawberry juice:
1.5 quarts of fresh strawberry juice in the bottom of the stockpot
Next, I added the chaga sumac tea, a bit more water, and enough honey to get me to a 15% initial alcohol potential:
15% initial alcohol potential
Then I pitched the yeast into the carboy, poured the must in after it, and topped it off, to give me 3 gallons of strawberry thunder goodness:
3 gallons of Thunder Strawberry Goodness
I initially thought about calling this batch Strawberry Solstice Mead, but the Solstice was a few days ago, and right when I was making this batch a classic summer thunderhead blasted its way over our house. Strawberry Thunder it is! I expect this batch to be potent, and dry, and full of strawberry flavor. Time will tell!
UPDATE, 12 April 2014
This mead went for a very long time without clearing! It still isn’t clear which is somewhat of a rarity for me these days. I’m sure it’s because of the extra pectin from the abundance of strawberries I used. I finally racked it today and, while not clear, it is delicious, a bit sweet, and tastes strongly of strawberry, coming in at 12.5% alcohol, meaning there is 2.5% remaining alcohol potential, which is somewhere between semisweet and sweet. The strawberries add another layer of perceived sweetness so we’ll call this one a sweet mead.
Because it didn’t clear, I may end up not bottling it in the normal 750ml clear wine bottles, instead using smaller grolsch bottles or larger jugs, for use at fireside gatherings where it will be served in horns and the lack of clarity is not to be noticed. :-)
We’ve been enjoying Kombucha in the house on a regular basis for a couple of years now. I don’t make it, my wife Lisa Marie does. This entry on how she makes the kombucha has been in the works for nearly a year — let me publicly apologize for taking so long to post this. Thanks to Lisa Marie for outlining her method on kombucha for bardicbrews.net readers.
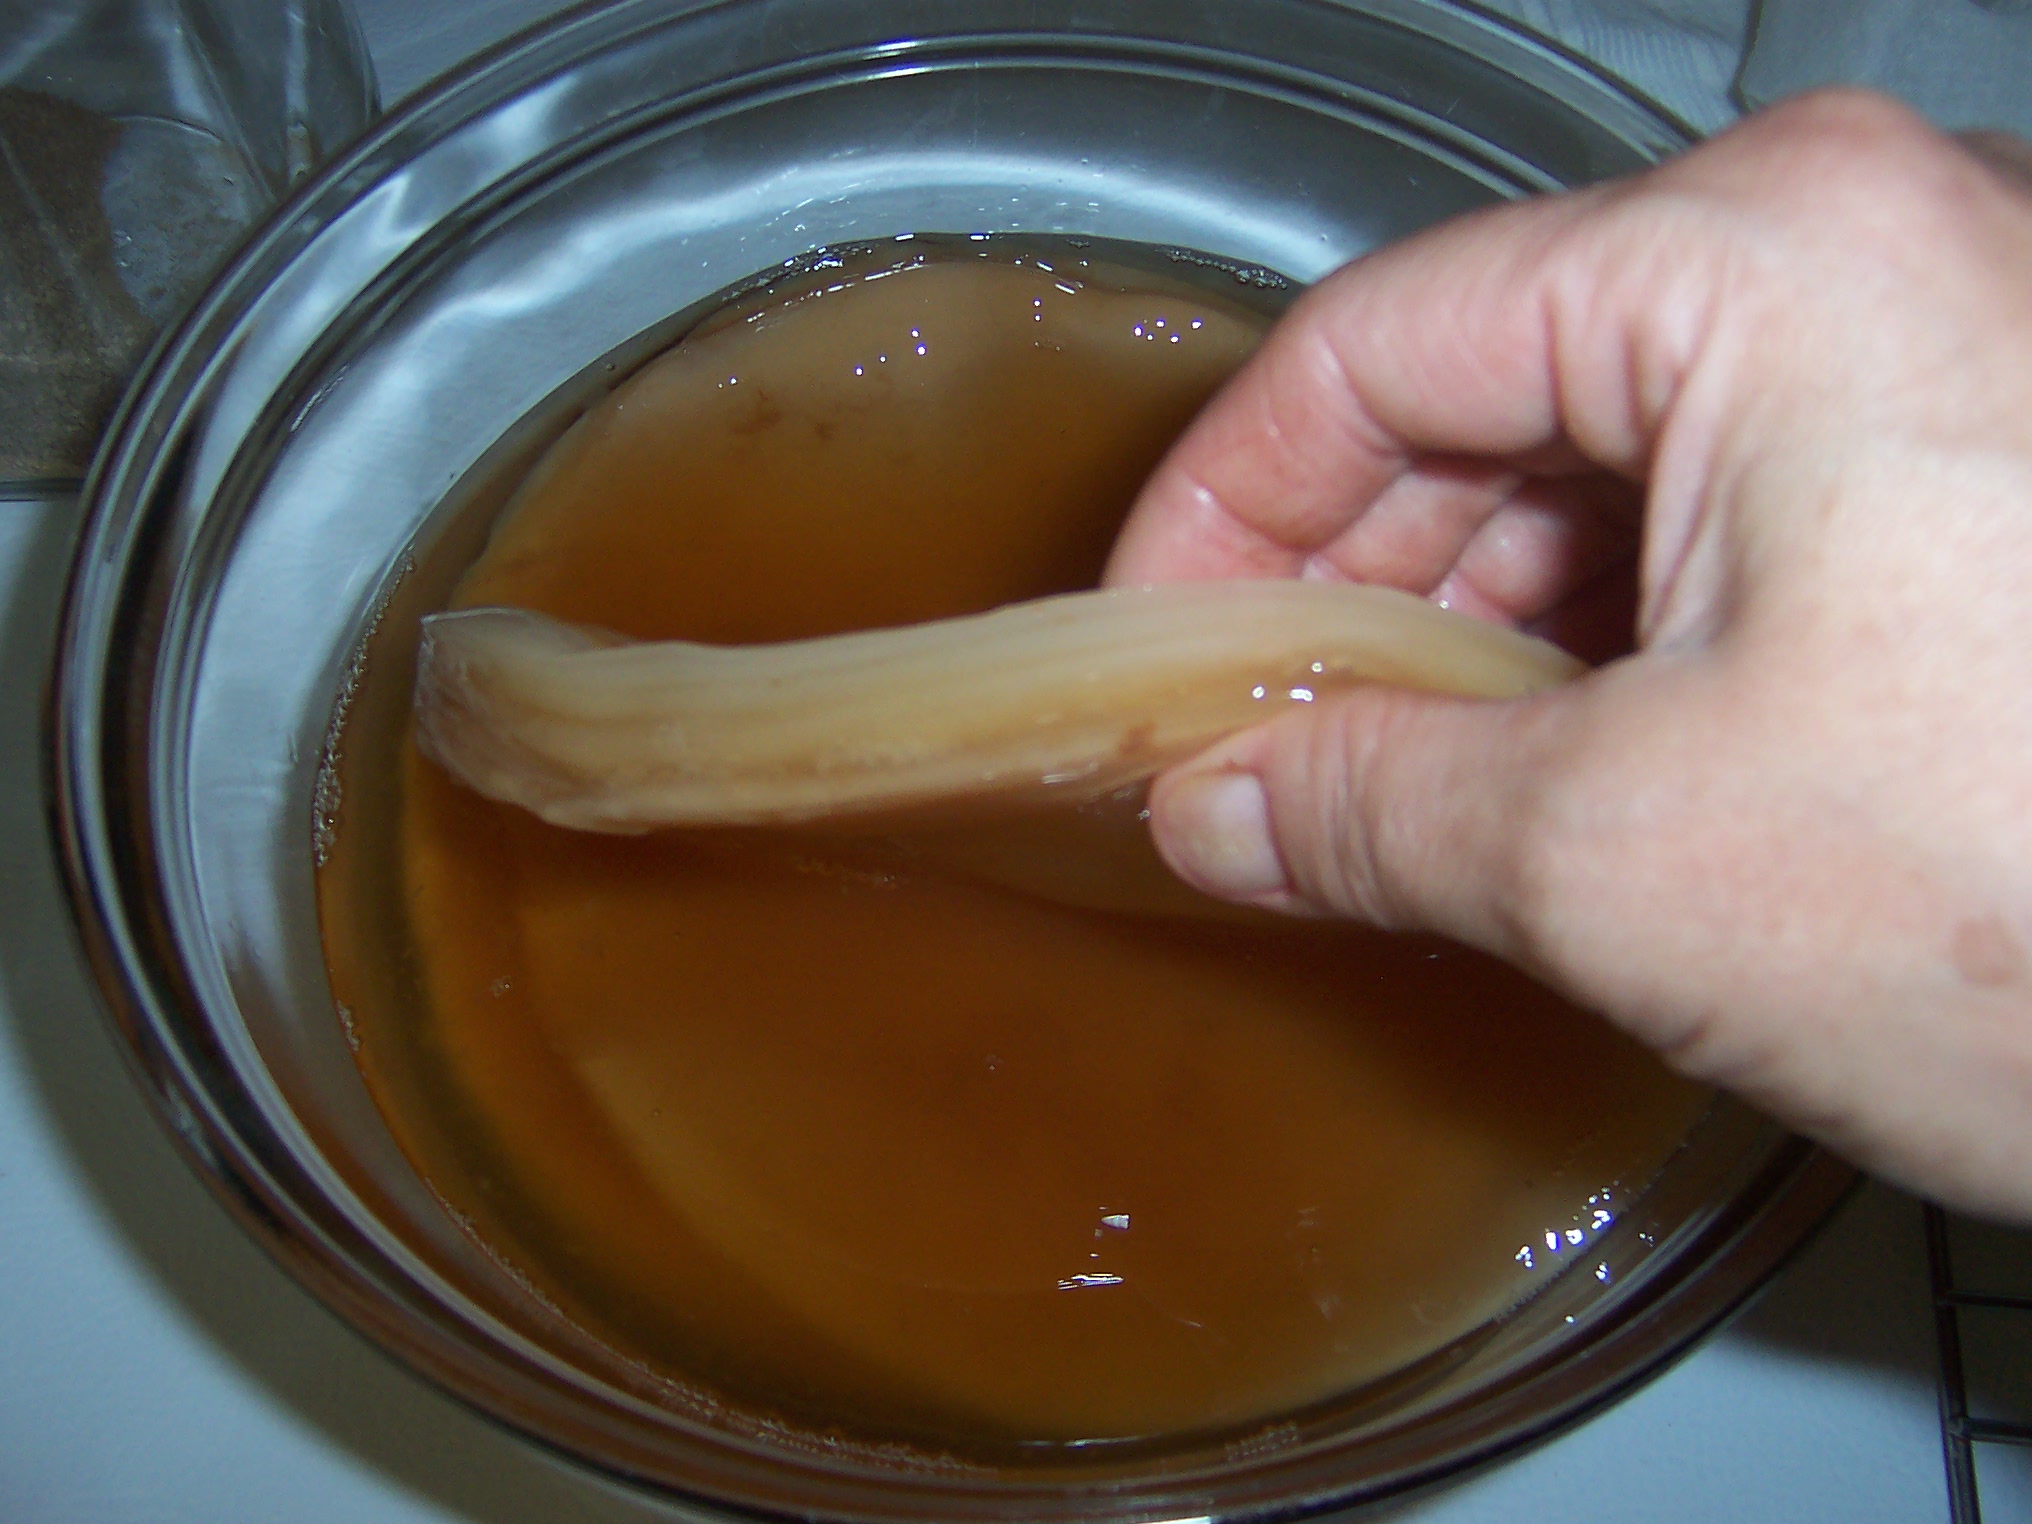
Kombucha is “an effervescent fermentation of sweetened tea.” But rather than using yeast to “eat” the sugar and create alcohol, we use something called a SCOBY. SCOBY stands for Symbiotic Culture Of Bacteria & Yeast. It is a coherent structure, almost like a “blob” or a collection of slime that looks like this:
This is a SCOBY
In general it is best to get a SCOBY from someone willing to barter; paying for these things (unless it’s like a buck or something) is just dumb. Wrong energy, at least in Lisa Marie’s opinion. If you don’t know where to start, don’t start on the ‘net. Ask around at local health food stores, etc. You meet some of the coolest people this way. : )
You will also need a container for fermenting, NOT a carboy with an airlock. We prefer a traditional crock. We have also used a glass gallon jar, but didn’t get as nice a ferment out of it. Perhaps it was too much exposure to light? We don’t recommend using anything metal. Metal should never come in contact with your SCOBY or your fermented beverage. Check around yard sales or flea markets for cool crocks.
As always, use the best water you can. If there is fluoride or chlorine in your water it won’t help your brewing in any way.
Kombucha is also made with tea. We use the store brand of organic black tea. We prefer a caffeinated black or green tea to make my kombucha, though there are several variations and combinations of herbs and teas that could be used. This is where the internet is quite helpful. There are so many people experimenting with kombuchas these days, which is fantastic.
You will also need sugar. The type of sugar one should use is controversial. No, you can’t use honey because honey is an antibacterial and will kill your SCOBY. Different sugars will give you different-tasting kombuchas. Our advice is to always go as local as possible and use something as unrefined and as organic as possible. We use organic cane juice. I’ve been jonesin’ to try a local maple sugar. Maybe someday soon!
Add-ins… This is where the fun starts. The one we’ve been stuck on recently is Rosehip Kombucha. It’s fun to experiment, but definitely do your research first. Some plants and mushrooms are antibacterial and/or antiviral. Keep those away from your SCOBY! Add-ins can be added to the tea during fermentation (like the rosehips) or to the bottle before filling with the fermented tea (like spirulina powder, cider, or grated fresh ginger).
You will also need bottles, and other supplies like a funnel and a ladle. We prefer Grolsch bottles because they are easy to use, are re-usable, and don’t require new caps periodically. For making the tea you will need a wooden spoon and a strainer. Lastly, you will need a thin cloth like a handkerchief or a cloth napkin and a rubber band to cover the crock during fermentation.
The Process
This recipe for Rosehip Kombucha makes 1 gallon or about 6 12-oz. Grolsch bottles’ worth of ‘booch.
1. Boil 1 gallon of water:
2. Turn off heat and add 1 c. sugar, 5 tea bags (or approximation of equivalent tea), and a couple handfuls of dried rosehips:
1c. sugar, 5 black teabags, 2 handfuls of rosehips
3. Stir well with wooden spoon and let steep with lid on. If you are using black tea, do not let this steep for more than 10 minutes. Our research has shown that steeping times longer than 10 minutes release unhealthy amounts of fluoride into your teas.
4. Strain tea into crock:
Strain the tea into your crock
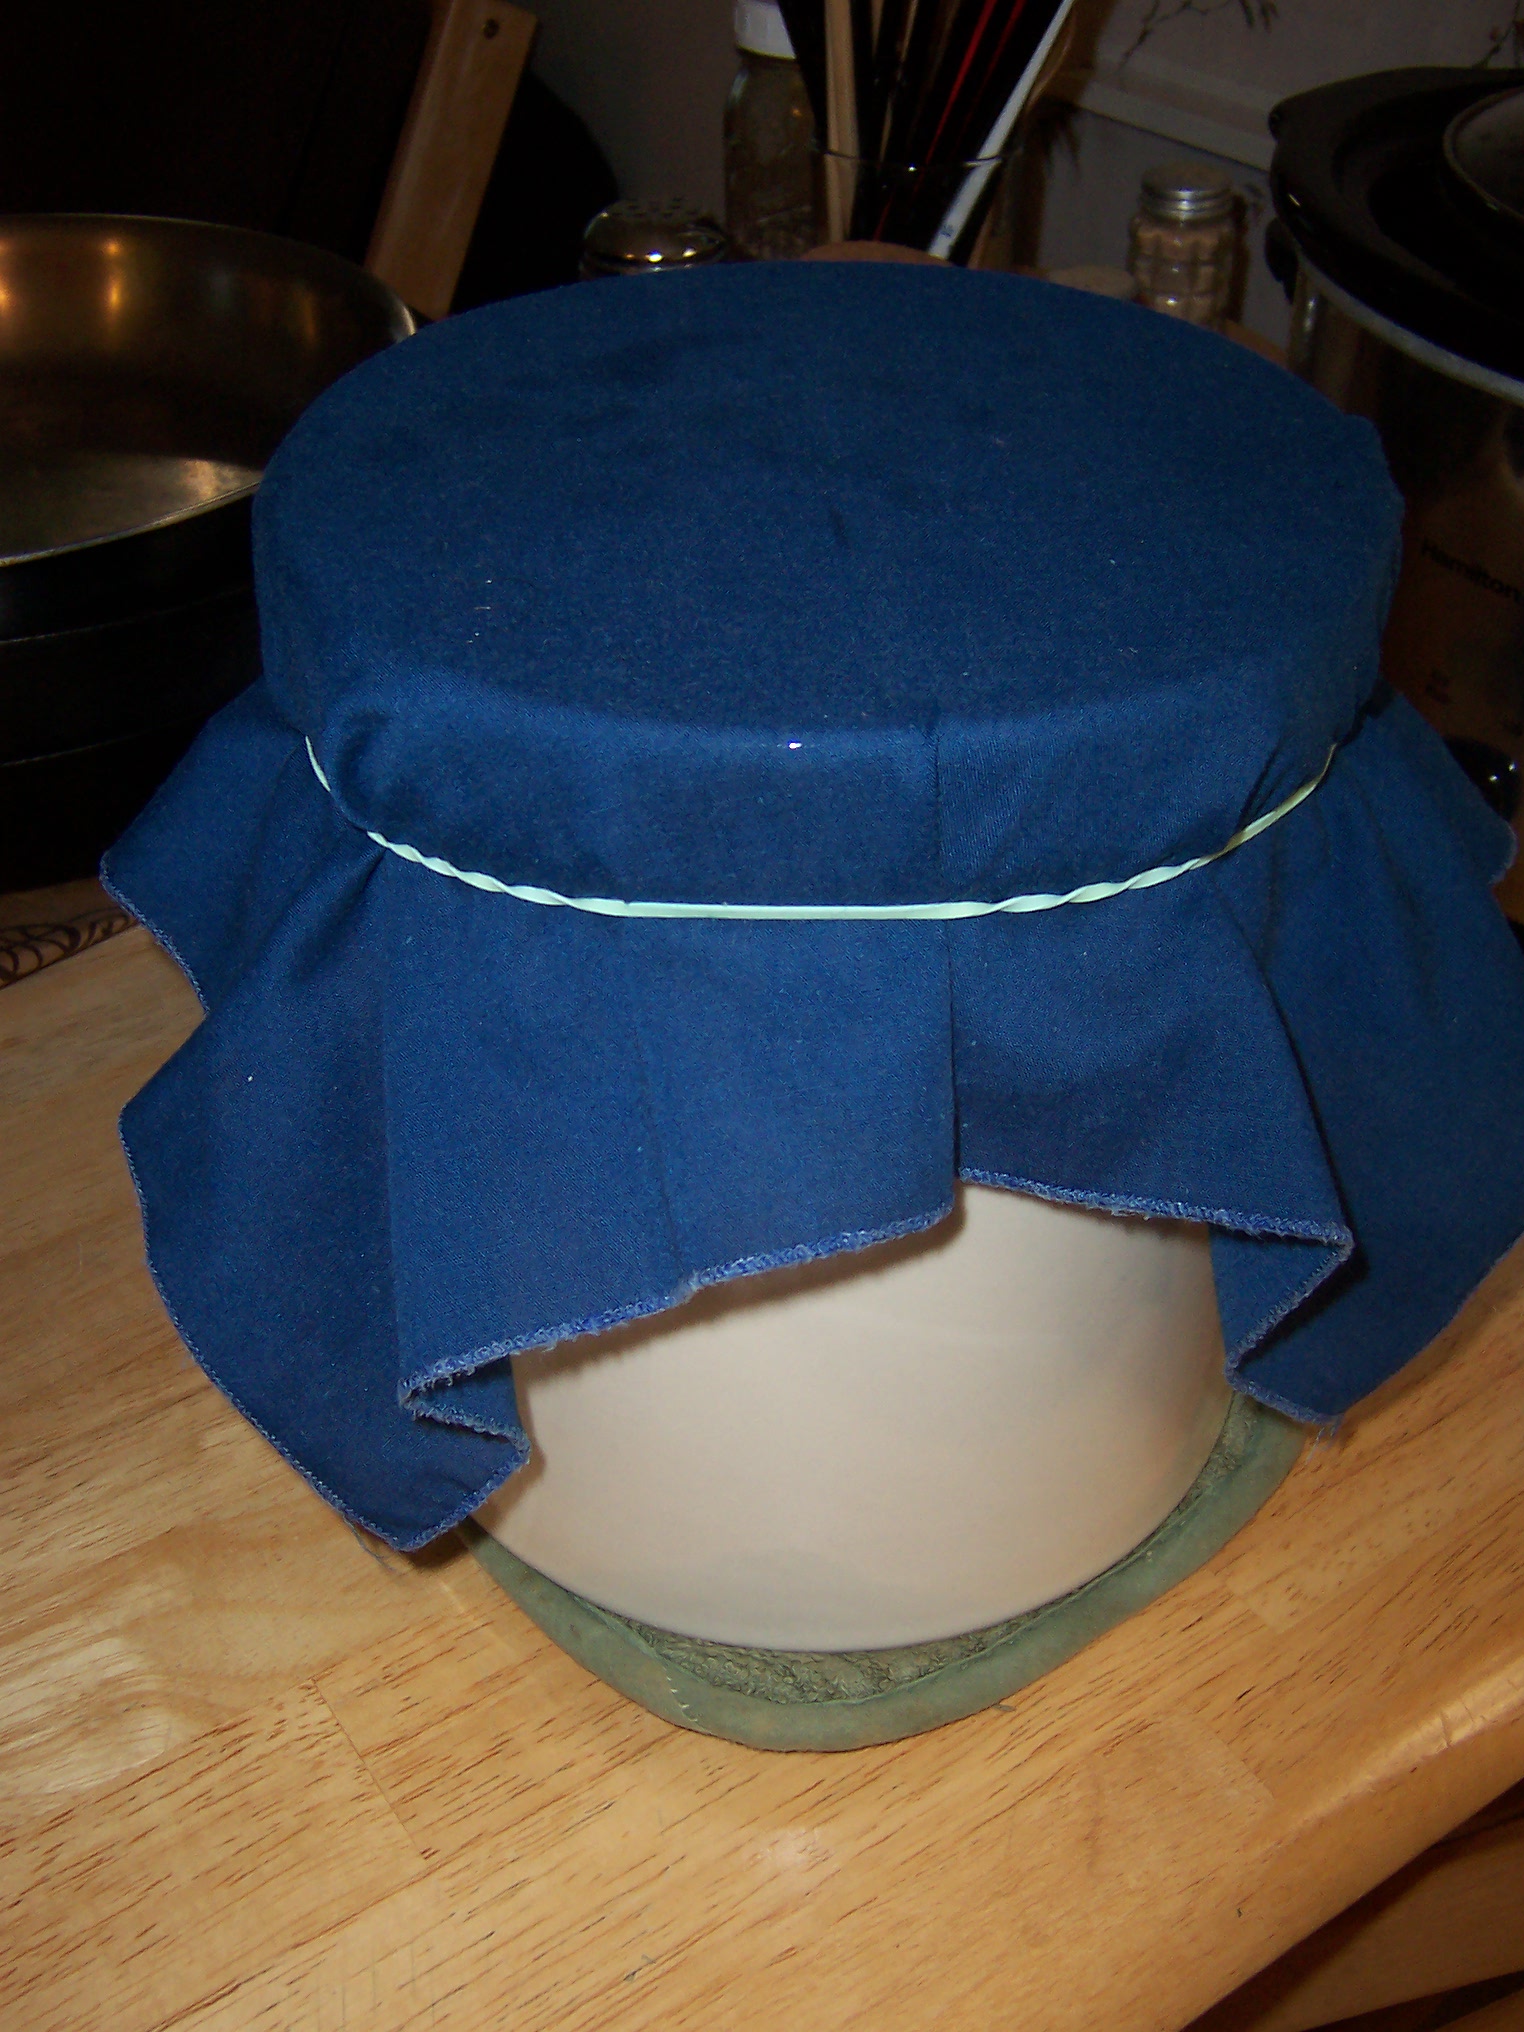
5. Cover with cloth and rubber band and let cool to room temp (test with pinky):
cover crock with a cloth & rubber band and let cool.
6. When cool to room temp, stir in (with your wooden spoon) about 1 cup of a previous batch of kombucha. Gently lay your SCOBY [my picture shows a mother with a few babies… some are thicker, some are thinner) on top of the tea mixture. Don’t worry if it sinks. It will eventually rise up in a day or so.
A one-gallon crock filled with sweetened tea, and a SCOBY floating on top. In time, this will be kombucha.
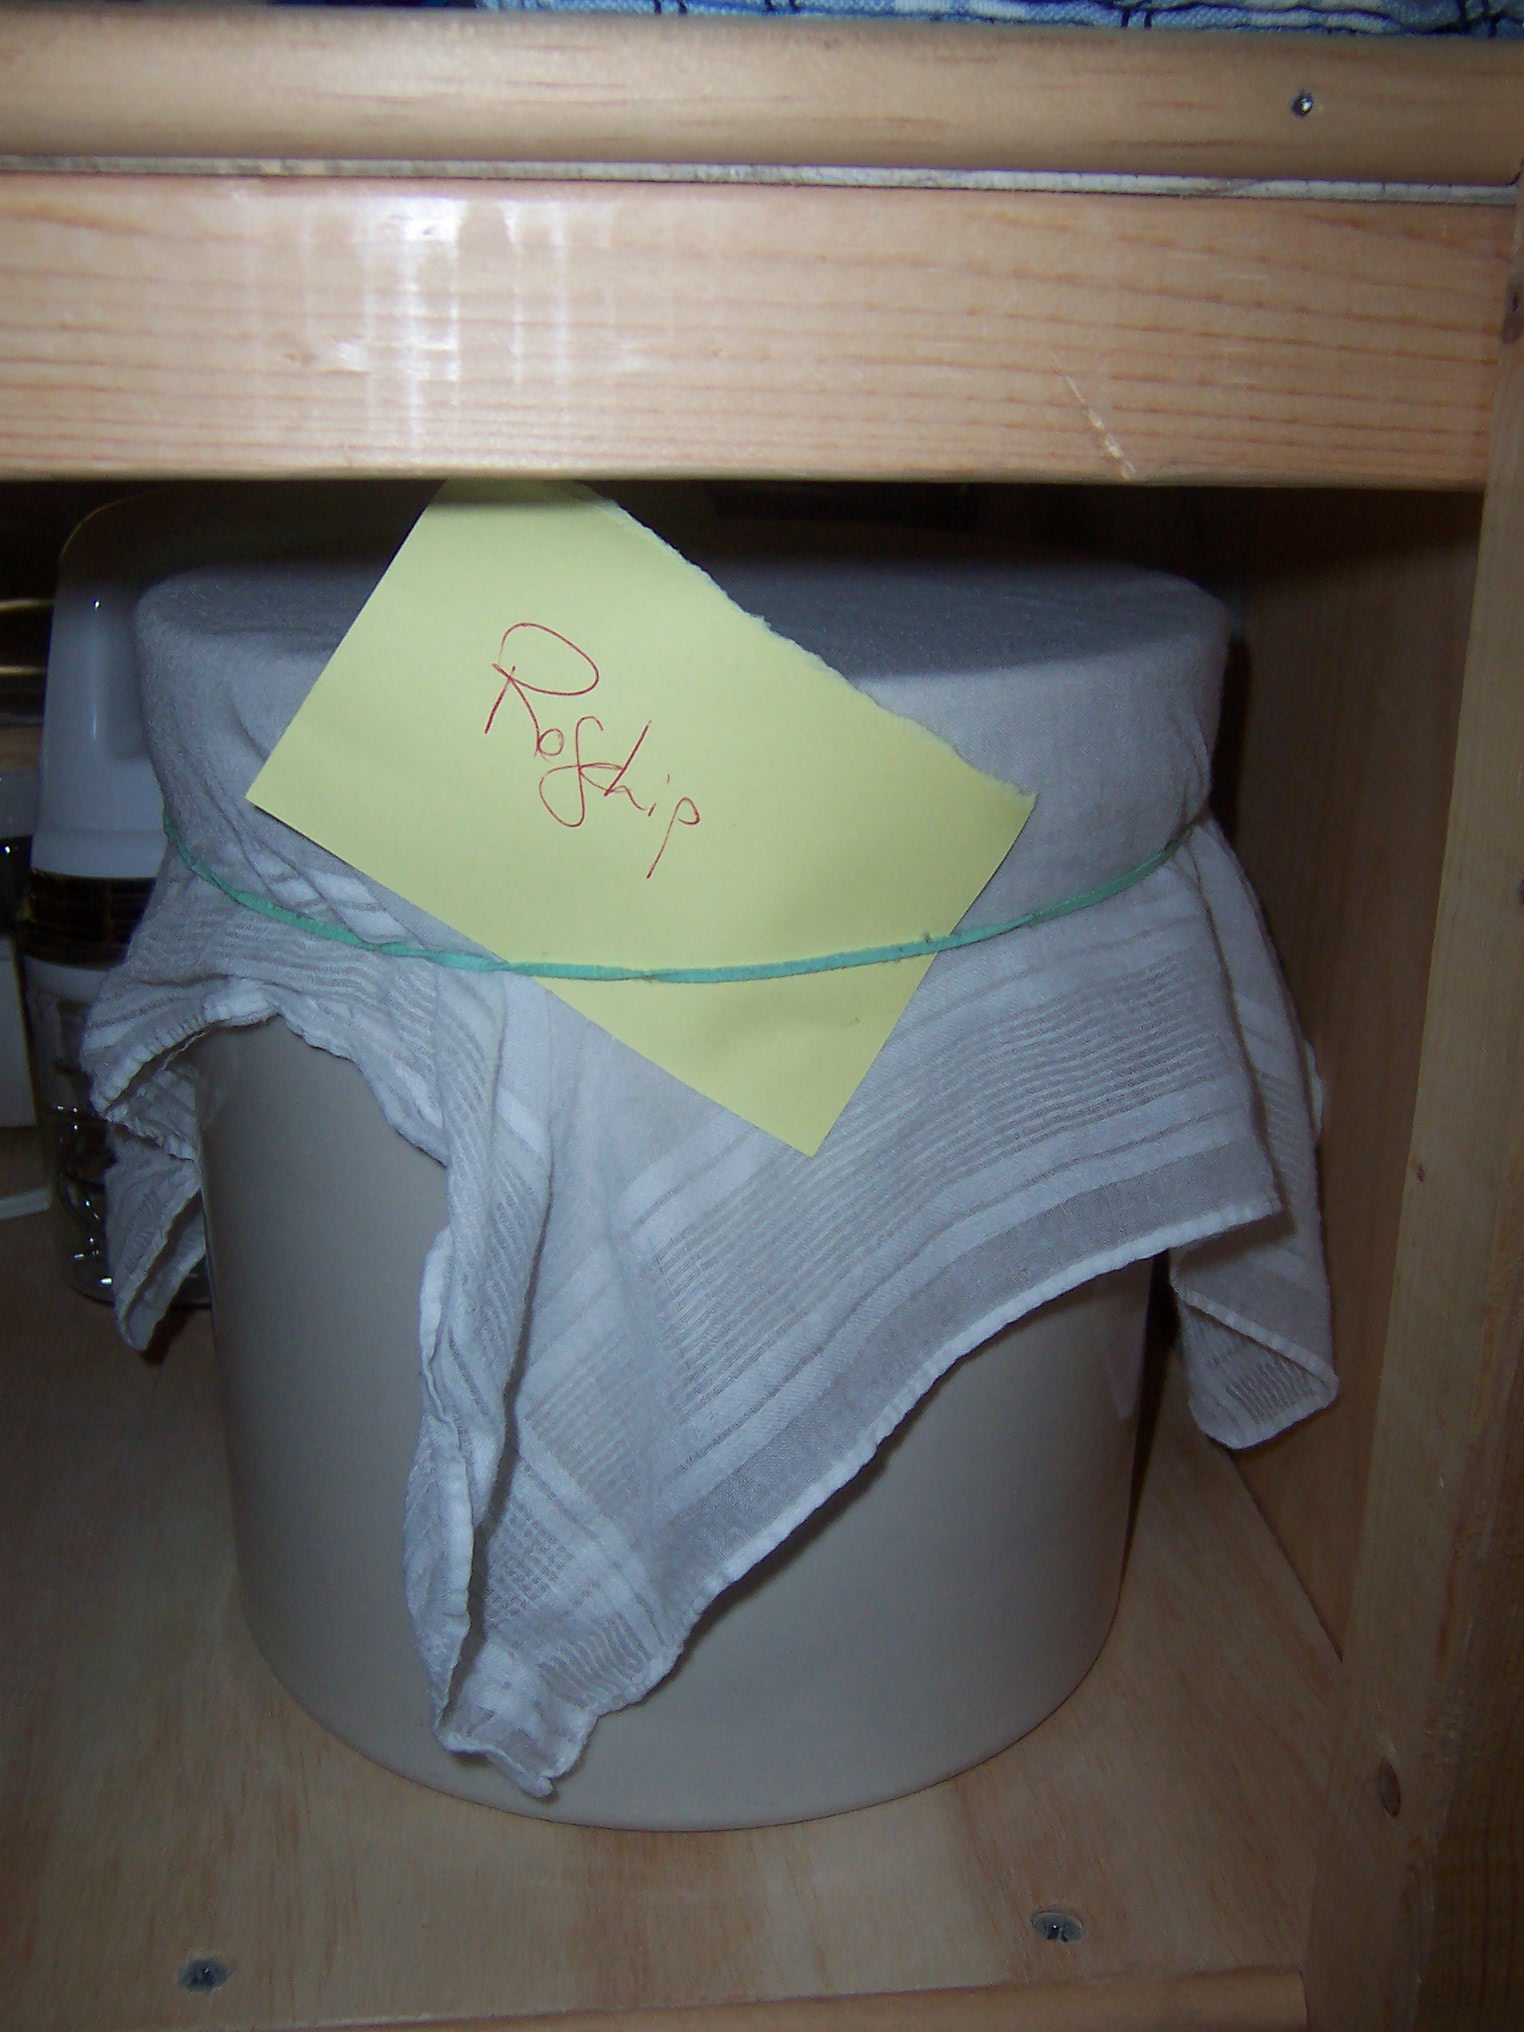
7. Cover with cloth and rubber band and label, if necessary.
‘Booch during fermentation.
8. Most kombuchas take anywhere from 7-30 days to ferment. We always check ours after about 5 days to see where it’s at. Using a wooden or plastic spoon, take a sample from underneath the SCOBY and taste it. Some people like it more vinegary, some more sweet. When it tastes good to you, it’s ready to bottle.
9. For bottling, we prefer to use Grolsch bottles with re-useable seals at the top. It’s important to ladle the ‘booch slowly, with the bottle turned at a steep angle to preserve carbonation and prevent overflow.
Remember, some kombuchas are fizzy and some aren’t. This has to do with ingredients used and ambient temperature of the room in which you’re storing the kombucha, as well as how much sugar is left in the tea when you bottle. Some of our kombuchas have gone in with no fizz and have opened with quite a bang! To prevent a mess, always open a homebrew kombucha bottle over the sink!
Storage advice varies from person to person. We store ours outside the fridge and put in two each night for the next day. Refrigeration slows fermentation; I still want those yeasties working.
You’re going to get little kombucha stringies (some call them “threads”) or mini-mothers (little SCOBY) in your kombucha. They’re totally fine to ingest – and are actually quite beneficial to the gut! Go ahead: slug ’em back!
It’s been cold this week. Maine gets cold in the winter, but this past week has been like nothing I’ve seen in a long time, in terms of the number of cold days in a row. We haven’t seen 20 degrees Fahrenheit in nearly a week, and the lows have been in the negative double-digits.
Clearly it’s time to hibernate, and a hibernation mead is in order. This will be (for now) a plain mead, though I am definitely thinking about trying my first spiced mead. I began with basically the same recipe as Mad Trad D from the Mad Trad Trial: chaga and sumac with my basic mead recipe. This is a nice, rich decoction:
At the end of a 12-hour chaga decoction, I tossed a staghorn sumac drupe in for the last 15 minutes
Once I cooled it down to blood temperature, I added enough honey to get to a 16% initial alcohol potential:
16% initial alcohol potential
After I pitched the yeast, I was left with a beautiful brown must:
A plain mead…. for now.
There will be more to this story…. spicing. Hmmm……
UPDATE: May 15, 2013
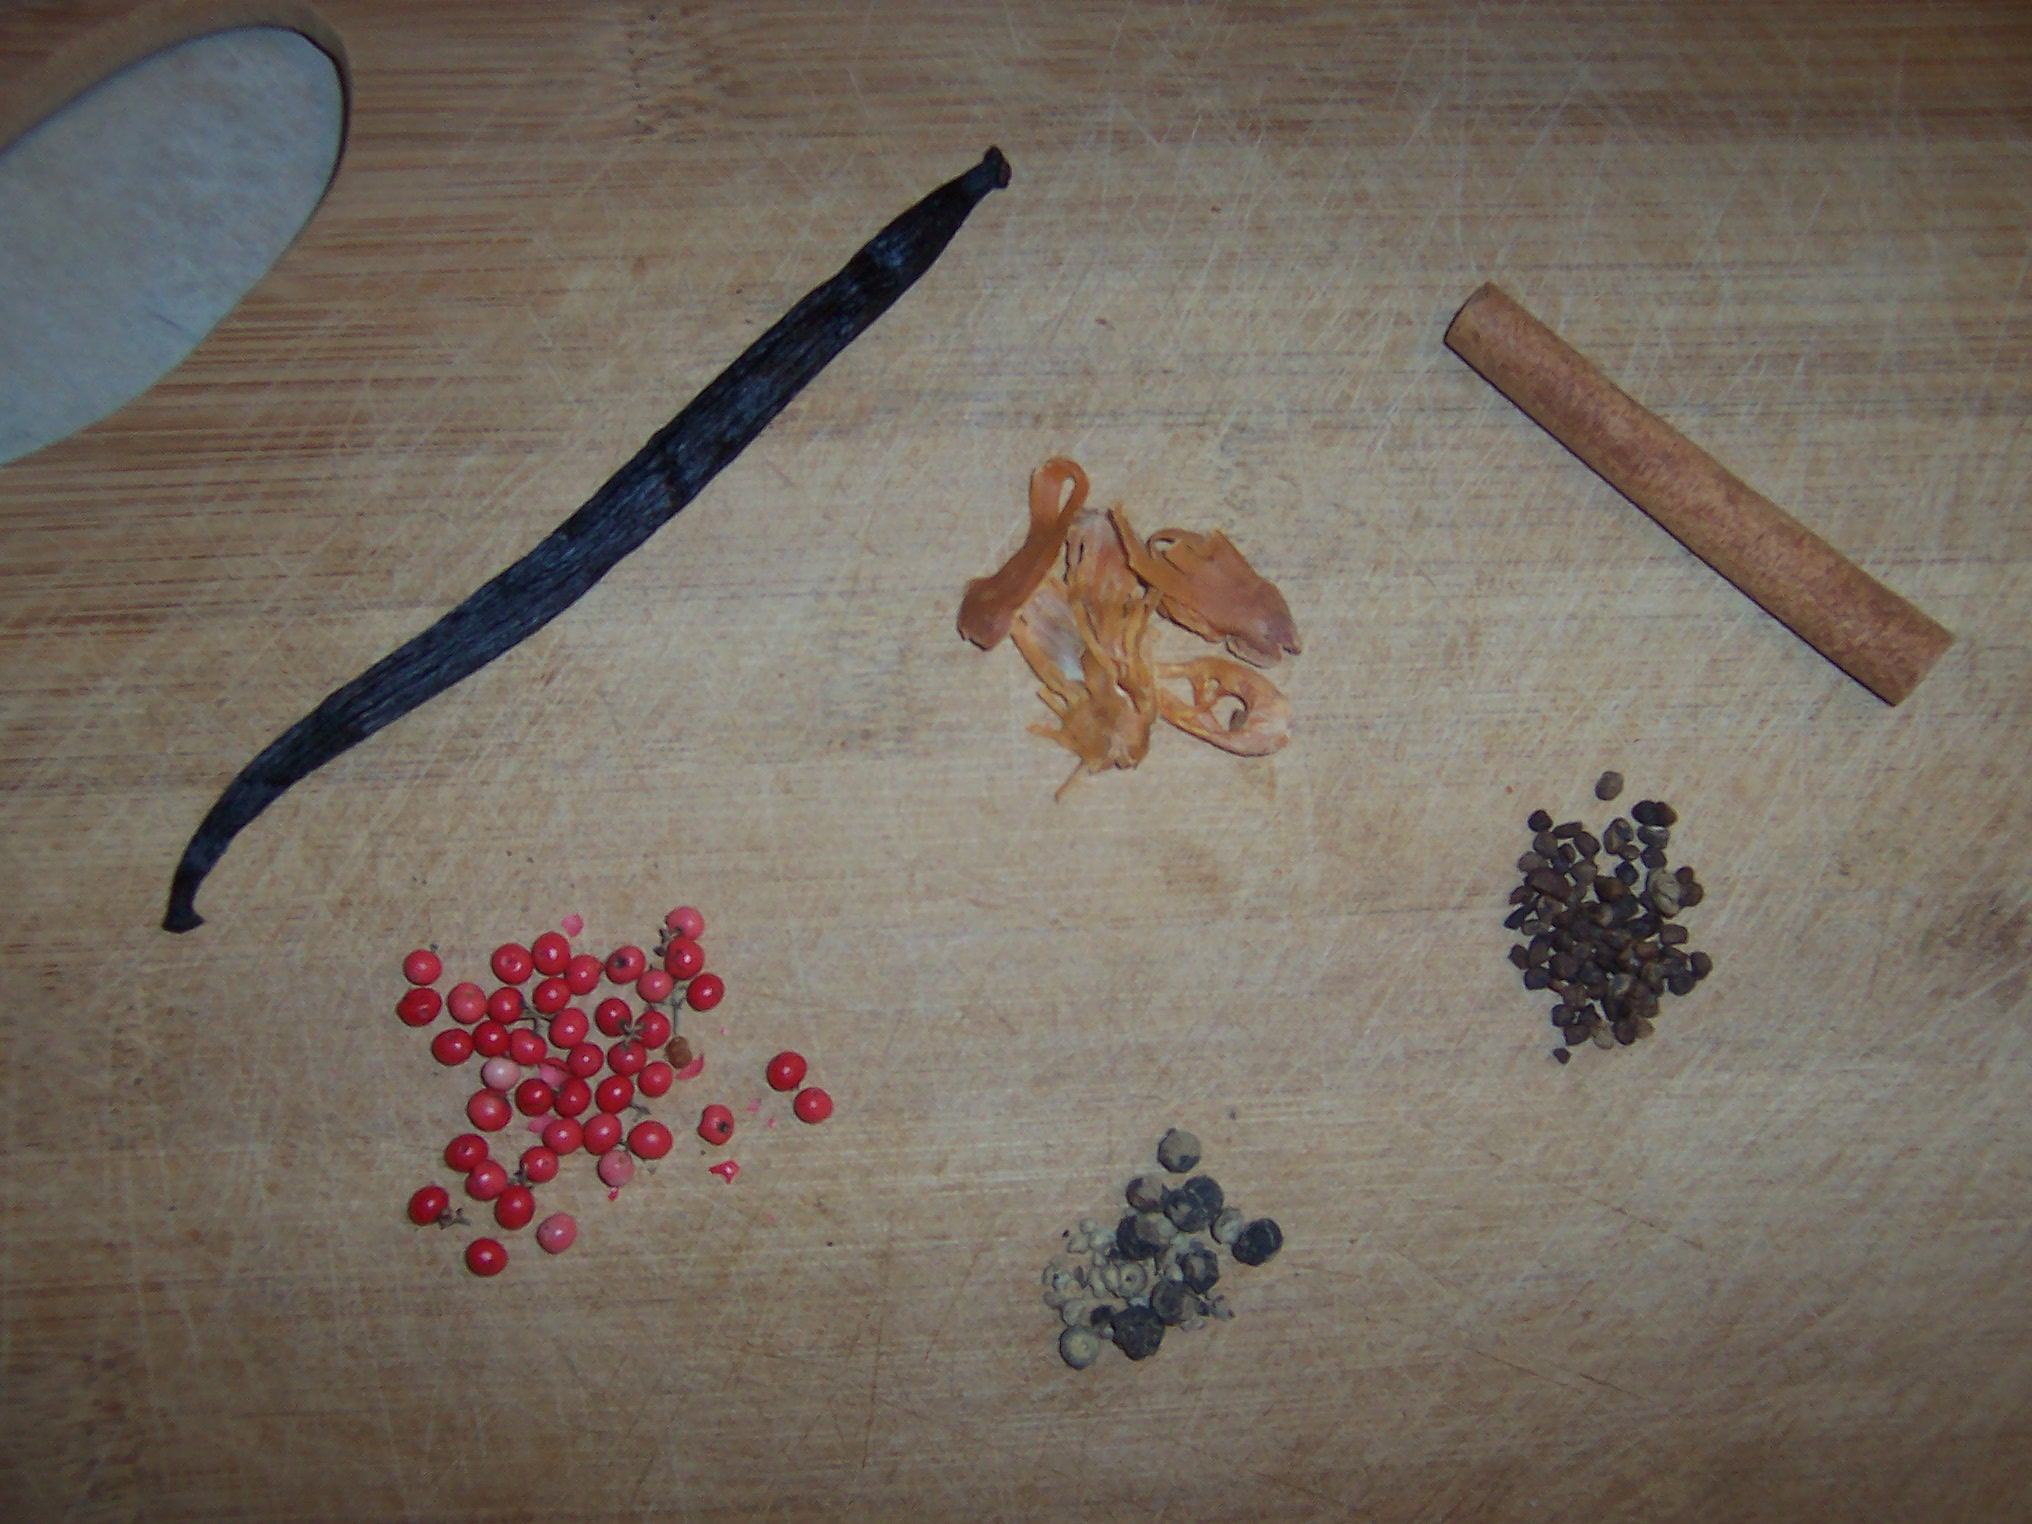
Much to my surprise, this mead has already mostly cleared. So I racked it today, as well as adding a spice packet to it. I thought a lot about what spices to add, and decided to emulate a chai spice (hence the modified name of Chaibernation Mead… heh heh). Specifically, I added a vanilla bean, a cinnamon stick, a few mace husks, cardamom seeds, black peppercorns, and dried red peppercorns:
Clockwise from top left: vanilla bean, mace husk, cinnamon stick, cardamom seeds, black peppercorns, red peppercorns.
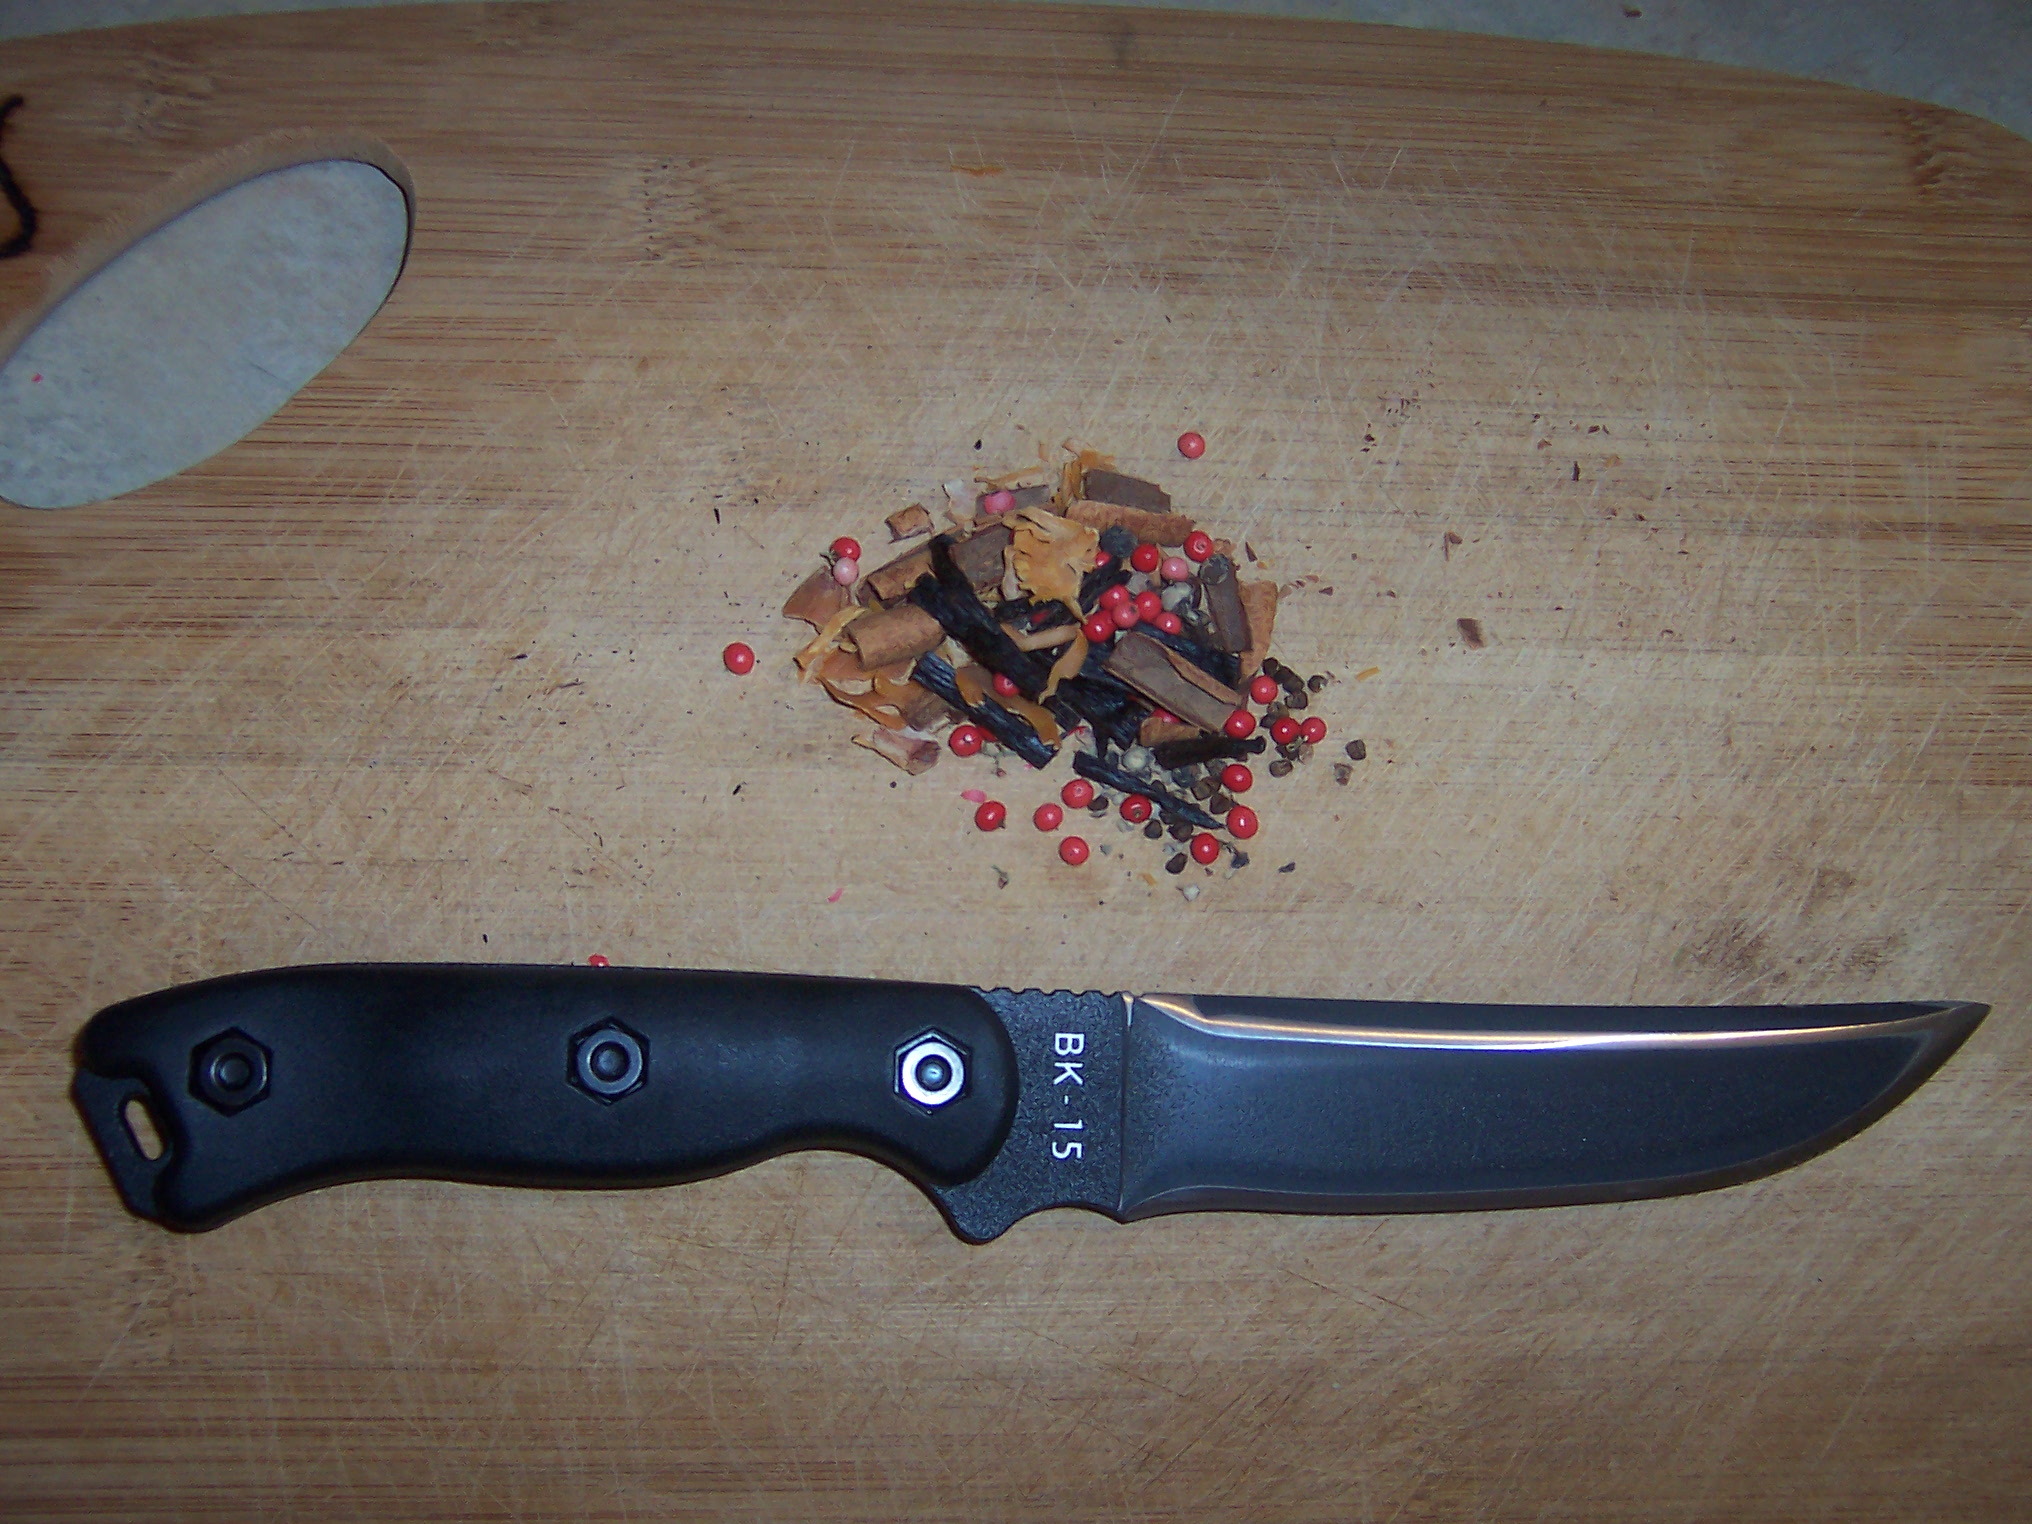
Then I chopped them all up:
spices chopped up with my Becker BK15
And lastly, put them into a sealable teabag (sealed with an iron):
spice bag ironed shut.
I also took a hydrometer reading after I racked it, it is presently 2.5% alcohol potential, which means this is a semisweet mead at 13.5% alcohol. With the spicing mixture it should be great:
Racked mead, with a spice packet floating at the top. Normally I rack into 1 gallon jugs, but all my jugs are full at the moment so I used a spare carboy.
Next step: check the flavor profile on this starting in a couple of days. I don’t want the spice to be overwhelming.
UPDATE: May 23
The spices have been steeping for a week, and wow! Delicious thus far, but I want to let it go another week to let the spice flavor grow a bit stronger and settle in. This is gonna be a good one!
UPDATE: May 31
Tasted it again tonight, and it is perfect! Ready for bottling, which I will hopefully accomplish this weekend. Wow, this is really good! Will get even better when it ages…..