I think of a braggot as a type of mead, but actually it is more like half-mead, half-beer. It is mead made with some of the fermentable sugars having come from grains, as opposed to honey. This is not the first braggot detailed on this site; my friend and meadmaking mentor Harper Meader posted his recipe for Raspberry Braggot a couple of years ago.
Note that with braggots, we can accurately use the term “brewing” for the process, since we are extracting fermentable sugars from the grains. Despite this, I regularly use the term “brewing” as it applies to mead; since the vast majority of the time I am beginning with some sort of tea rather than plain water, I feel I can justify using the term.
I was very pleased that this batch of braggot meant I got to spend time in Bar Mills, Maine with my good friend Kevin (you can see his blog here if you are interested). We had spent time brewing beers together several years ago, right up until I fell in love with mead and pretty much stopped doing beers. Kevin has been making beer for a long time, and I learned a lot from him, so it was nice to spend time with him in brewspace once again.
One difference in this batch and Harper’s recipe is that he used malt extract, which is a commercially-available, thick, syrupy extract in liquid form, where the fermentable sugars have been extracted industrially. Since I can remember, Kevin has preferred to make beer using whole grains, as opposed to malt extract syrup. In his experience the whole grain brews give a richer, more complex, and better overall flavor. I wasn’t about to argue with him, and when I wanted to try a braggot I knew I would be picking his brain on how to do it whole grain style.
The grain in question for most beers (and braggots) is barley. There are many varieties of barley that can be used, each of which has its own color and flavor profile. Kevin was planning a batch of Traditional English Bitters Ale, and had acquired the appropriate strains of barley to use in this recipe, so I thought I’d adapt them for this braggot.
We began with 64oz (4 pounds) of grains. Most of the grains were Maris Otter Barley, with about 1oz of British wheat and 5oz of British Crystal Malt mixed in to achieve the flavor profile for the ale he is brewing. We began by measuring out 64oz of the barley mixture:
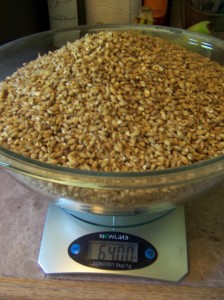
The first step in brewing is to begin to activate the enzymes which will extract the sugars from the grain — a process called “Mashing” (there is lots of jargon associated with making beer — bear with me and I will try to explain all the terms as they come up). To do this, you must put the barley in water that has reached a certain temperature, and maintain that temperature long enough for the sugars to come out. In this case, we want to mash our barley at 150°F for 90 minutes.The temperature is important; too low and the mashing will not occur; too high and other things get released from the barley which affects the flavor.
We wanted to end up with about 2.5 gallons of “wort” (this is the sugar-rich liquid that will eventually become beer — akin to the term “must” with meadmaking), and later in the process we will be boiling down the liquid to reduce it, therefore we started with 4 gallons of spring water in a very large, 8 gallon stockpot:
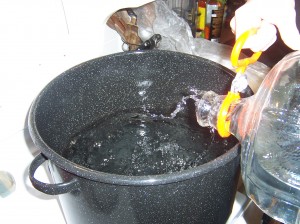
Because the barley will cool down the water a bit when it is added, we heated the water up to about 160°F so that it would be right at 150°F after the barley was added:
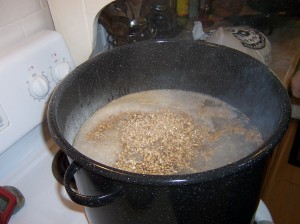
After you add the barley to the 160°F water (and it cools down to 150°F more or less instantly), the biggest concern is maintaining a constant temperature for 90 minutes. We accomplished this by preheating the oven to 170°F, turning off the heat, and putting the “mash tun” (this is simply the stockpot in which mashing occurs) into the warm oven.
After the time is up (90 minutes in this case), the next step is to heat the wort up to 170°F, which will put a stop to the mashing process:
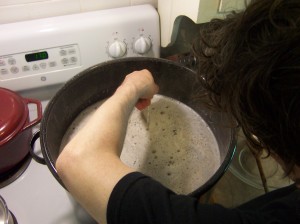
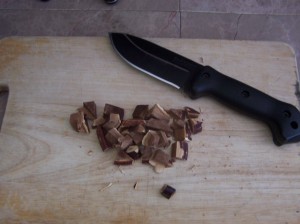
While the wort was heating to 170°F, I had some time to plan ahead. Normally with beer, a bittering agent is added at the next stage, and the vast majority of time over the past 500 years, that bittering agent has been hops. However, I’m not a huge fan of using hops for reasons that have been well documented (see Stephen Harrod Buhner’s work, where he describes the xeno-estrogenic, soporific, and sedative effects of hops). Instead, I am using Reishi, which is very bitter and works well in meads. Reishi is tough and difficult to cut without a good knife, but I had my Becker BK2 with me and it make short work of the reishi.
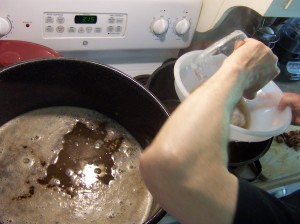
The next step is to separate the liquid wort from the spent barley grains. Traditionally, this has been doing using a technique called “sparging,” which is where 168°F water is gently sprinkled over the spent grains, and allowed to drain out the bottom of the container. This is a very complex process, but it gets every last bit of fermentable sugars out of the grains. However, it is time-consuming, labor intensive, and requires the use of extra fossil fuels to heat the extra water up.
Kevin had heard about a new Sparge-Free method that he wanted to experiment with. Instead of sparging, you simply strain the water out using a scoop, and use use a little bit extra grains to compensate for the extra sugars extracted through the sparging process:
Once the wort has been separated, it needs to be boiled, both to add the bittering agents (the Reishi described earlier), as well as to reduce the volume of the liquid, thus increasing the concentration of sugar:
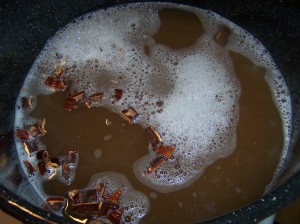
After the wort had boiled for about 90 minutes, it had reached about 2.5 gallons which is what I was looking for. However, at the end of this process, it is important to cool down the wort quickly; if it lingers at too high a temperature it invites bacteria to come in and infect the wort. There are sophisticated wort chillers on the market (which are actually really ingenious) but we ended up just putting the pot into a sinkful of cold water and soaking it, to bring down the temperature:
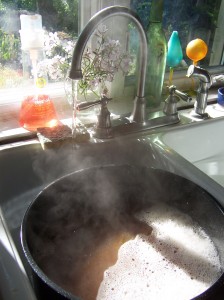
We drained the sink water 3 times until the wort cooled down to below 80 degrees. At this point we called it a day, and I returned home with a carboy full of wort.
Once I got home, I measured with a hydrometer and found that I had about 5% alcohol potential. At this point, I could simply add yeast, let it ferment, and when it was done I would have a very nice ale. However, this is to be a braggot, not an ale, so I added enough honey to bring the total alcohol potential up to 12%. This alcohol potential is a bit lower than what I usually go with for a mead, but for a braggot I think it will leave a nice flavor. Any beer that is more than 9 or 10% has a very strong flavor (at least of the one’s I’ve sampled) and I want this to be very drinkable. So 12% it is:

Lastly, the yeast was pitched, I added the wort/must into the carboy, shook it up well to oxidize, and sealed it off with an airlock:
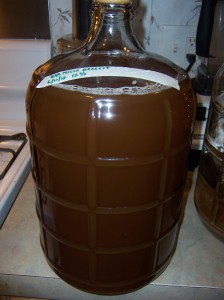
And there you have it! After reading this post you will know how to make beer from whole grains, in addition to braggot. Thanks again to Kevin for sharing his process with me!
From here, the process will be similar to any other mead; I’ll let it go until fermentation slows/stops, then I will rack it, allow it to clear, and I will bottle it, most likely into grolsch bottles. I doubt if I’ll use my traditional wine bottles, simply because braggot should be consumed while fresh, and not aged like other meads.
UPDATE: June 26. Racking.
To my surprise, this batch finished primary fermentation in about 2 weeks. The fermentation was very fast compared to normal mead; this is because there is much more yeast nutrients in the grain sugars than in plain honey. The airlock was literally bubbling 4-6x faster for this batch than it normally does. I racked this into another glass carboy on June 26, at which point I took an 11% alcohol potential reading.
UPDATE: July 8. Bottling.
I bottled the braggot tonight. Unfortunately most of the pictures I took didn’t come out, but I will explain the process. It’s a bit different for a braggot, because we want it to carbonate inside the bottle. This is accomplished by adding fresh sugar — called “priming sugar” — for the yeast to ferment inside the bottle; since the bottle is airtight (with a cap), the carbon dioxide cannot escape and instead dissolves inside the liquid. Typically, beers that have been “bottle conditioned” in this way are ready to drink in a week or two after bottling.
Specifically, I had some leftover dried malt extract that I could use as a priming sugar:
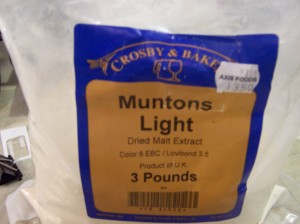
The formula I used comes from Charlie Papazian’s The Complete Joy Of Homebrewing. For 2.5 gallons of braggot (or beer), I need 5/8c of malt extract for a priming sugar. I dissolved this sugar into about a cup of spring water:
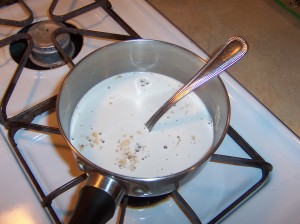
I heated this up enough to get all the sugar to dissolve. Then I poured this sugar water into the bottom of a plastic brewing vessel with a valve at the bottom, that I used to use regularly when bottling beers. Then, I siphoned the braggot into this same vessel, so that the sugar water would evenly dissolve. From there, I was able to fill each bottle with a siphoning tube just by using the valve, without having to siphon:
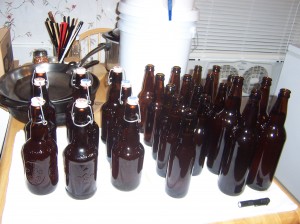
You can see the result in the above photo, I got 14 12oz bottles, and 4 22oz bottles all told, including losing some of it due to being careless and having a bigger than usual spill. :-(
The braggot tastes delicious now, though it is flat; I can’t wait to try it in a week or two once it’s carbonated!
